
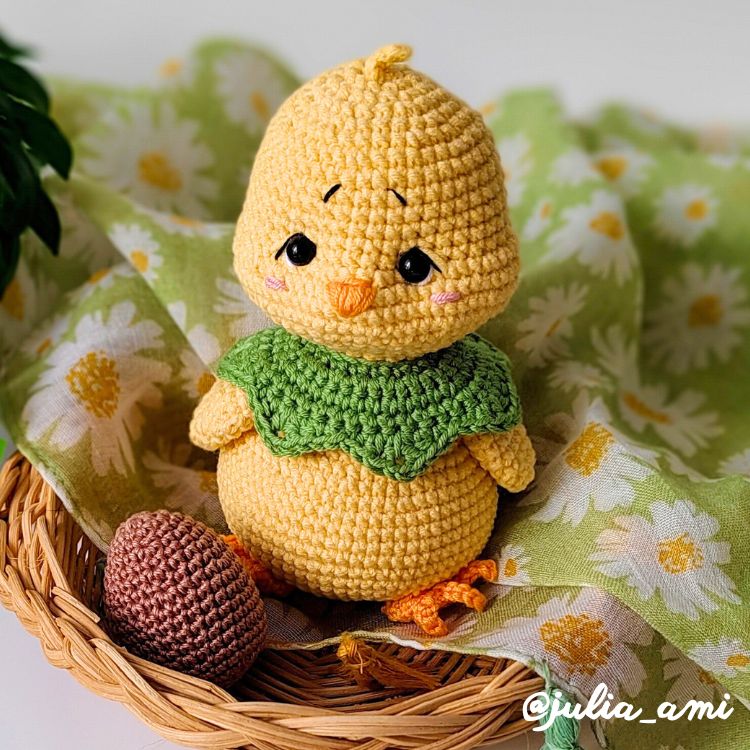
Cute Easter Egg Crochet Pattern
Would you like to crochet a cute Easter egg bunny? Look no further! I have a fun and quick Easter Egg Crochet Pattern just for you. With this easy-to-follow pattern, you’ll be able to whip up your very own Easter egg bunny in just an hour or two.
Crocheting is a delightful hobby that lets you unleash your creativity while creating something tangible and adorable. What better time to give crocheting a try than during Easter, when the world is brimming with colorful eggs and fluffy bunnies?
This post may contain affiliate or referral links. As an Amazon Associate, I may earn a commission from qualifying purchases.
Don’t have time to make it right this instant? Pin it for later →

About this Easter Egg Crochet Pattern
This Easter Egg Crochet Pattern is ideal for beginners, featuring basic stitches and techniques. You don’t need to be an expert to craft this adorable toy. Just grab some yarn, a crochet hook, and a touch of patience, and you’re all set!
You’re welcome to explore various yarn options, though I suggest using a slightly smaller crochet hook size than usual. This method produces tighter stitches, preventing stuffing from showing and enhancing the overall appearance of your bunny.

Materials
- Yarn in white, pink, and yellow.
- Size 2.5 mm crochet hook. This is my absolute favorite crochet hook I recommend to everyone.
- Poly-Fil Fiberfill stuffing.
- 5 mm black glass or plastic eyes (or embroider instead).
- Black and pink embroidery floss for nose, eyelashes, and eyes if not using buttons.
- Ribbon bow (for decoration).
- Blush and a brush (for applying cheek color).
- Yarn needle, stitch marker, pins, and scissors.
What did I use?
I used Schachenmayr Catania yarn, 100% Cotton, 1.76 ounces = 137 yards/50 grams = 125 meters.


Gauge and Measurements
Gauge isn’t crucial for this Easter Egg Crochet Pattern; you can easily adjust size by using a smaller or larger hook and different yarn.
My finished toy measures 2.36 inches (6 cm) tall, excluding the ears. For those aiming for the same size, this gauge can serve as a reference: a 10-stitch by 10-row swatch in single crochet should measure 3.5 × 3.5 cm (1.38 × 1.38 inches).
Abbreviations (US terms)
Here are the crochet abbreviations used in this Easter Egg Crochet Pattern. Note that instructions are written in US terms. The resource you may find helpful in following this pattern: Crochet Abbreviations.
| Abbreviation | Meaning |
|---|---|
| BLO | through back loop only (see tutorial) |
| Ch | chain stitch |
| Dc | double crochet stitch |
| Inc | single crochet increase = work 2 Sc in the same stitch |
| InvDec | invisible decrease = single crochet two stitches together front loop only (see tutorial) |
| Sc | single crochet stitch (e.g. 3 Sc = crochet Sc in next 3 sts) |
| St(s) | stitch(es) |
| Sl st | slip stitch |
| […] x n | repeat instructions in brackets n times |
| (…) | total number of stitches in the round |
PDF Pattern
The PDF version is perfect if you’d like to print the instructions, crochet offline, or simply support my work. You can find the PDF pattern in my shop.

Love Easter crocheting? Check out these FREE patterns.

Let’s Start the Easter Egg Crochet Pattern
Egg
Use yellow yarn. Crochet in a continuous spiral with a stitch marker.
R1: start 6 sc in a magic ring (6)
R2: Inc in each st (12)
R3: [1 Sc, 1 Inc] x 6 (18)
R4: 1 Sc, 1 Inc, [2 Sc, 1 Inc] x 5, 1 Sc (24)
R5: [3 Sc, 1 Inc] x 6 (30)
R6: 1 Sc in every st (30)
R7: 2 Sc, 1 Inc, [4 Sc, 1 Inc] x 5, 2 Sc (36)
R8-10: 1 Sc in every st (36)
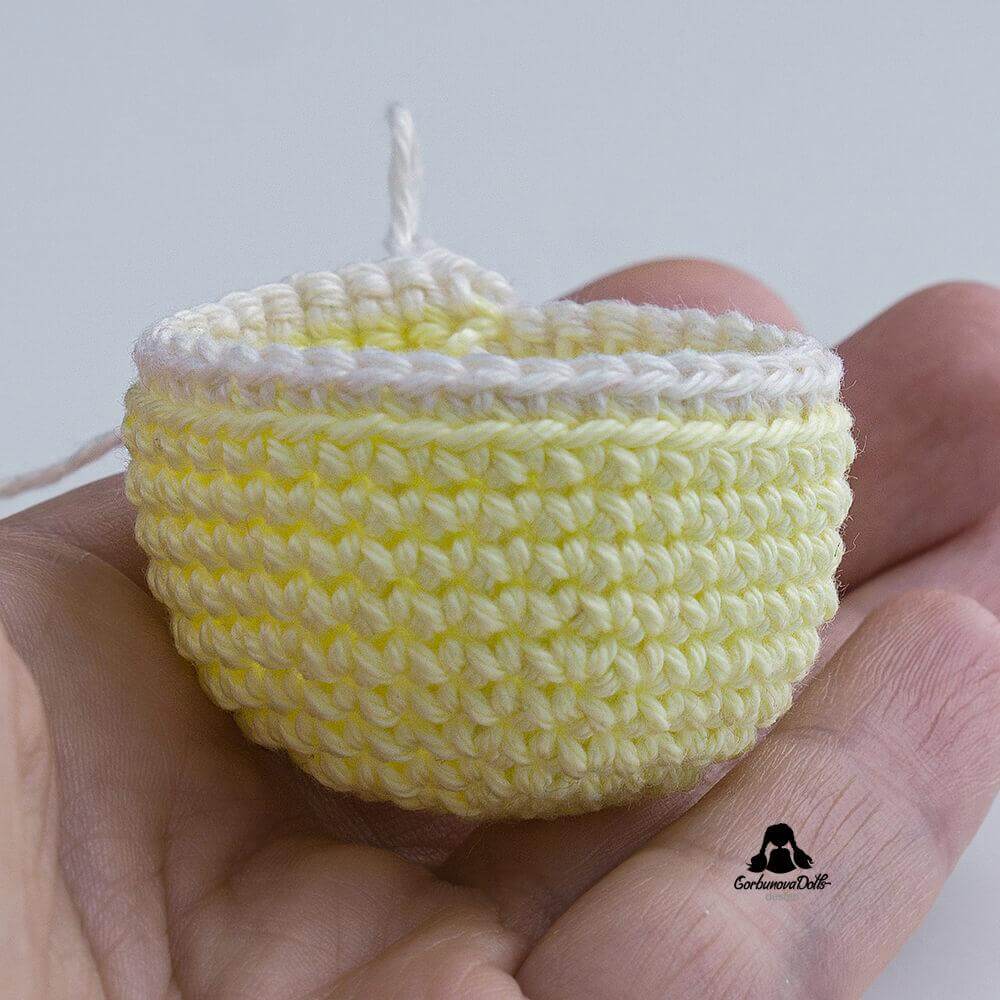
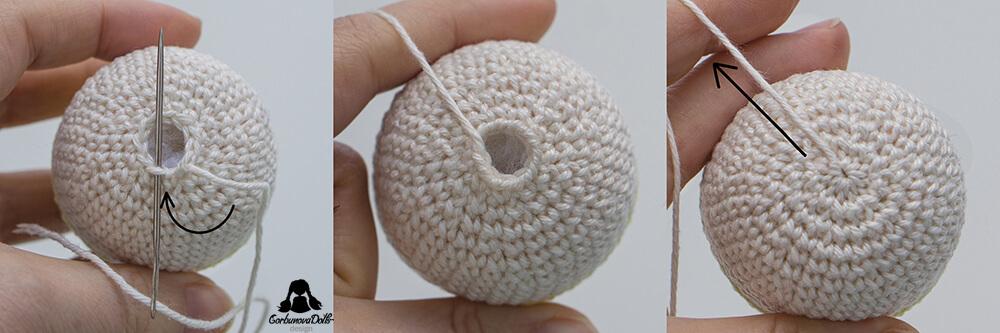
R11: 1 Sc in every st, remove marker, change color to white in the last step of next sc (Photos 1 and 2). Fasten off yellow yarn.

R12. 1 Sc in every st BLO (36, Photo 3)
R13-17: 1 Sc in every st (5 Rnds)
R18: 2 Sc, 1 InvDec, [4 Sc, 1 InvDec] x 5, 2 Sc (30)
R19: 1 Sc in every st (30)
R20: [3 Sc, 1 InvDec] x 6 (24)
R21: 1 Sc in every st (24)
R22: 1 Sc, 1 InvDec, [2 Sc, 1 InvDec] x 5, 1 Sc (18). Stuff firmly.
R23: [1 Sc, 1 InvDec] x 6 (12). Stuff.
R24: 2 InvDec, break the yarn, leaving a 6 inch (15cm) tail, thread it onto a needle, and guide into each front loop of the round (Photos 4 and 5). Fasten off the hole (Photo 6) and hide the end of the yarn inside the egg. Check out the video to see how to gather stitches.
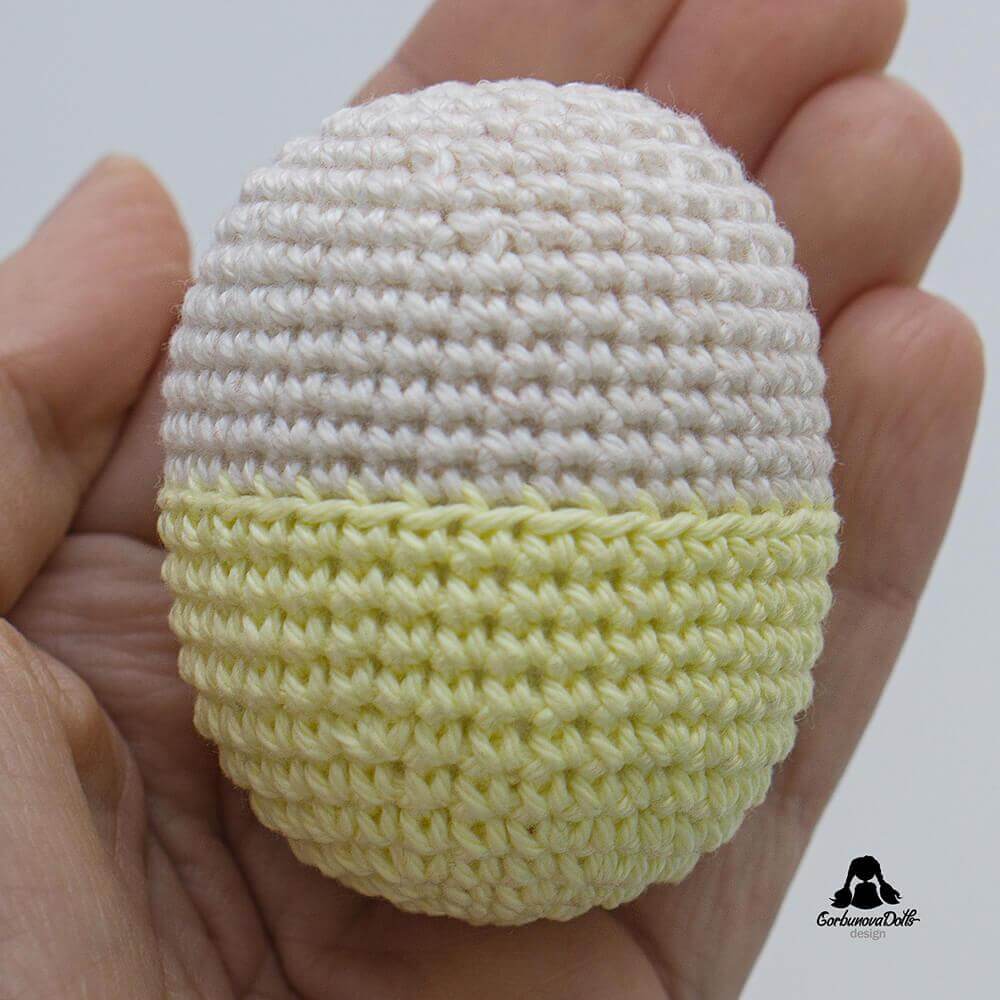
The egg is ready (Photo 7)
Little skirt
Use pink yarn.
Hold the egg yellow part up, return to the remaining front yellow loops, insert your hook into any front loop, pink yarn over (Photo 1), pull the yarn through this loop, Ch 1 (Photo 2),
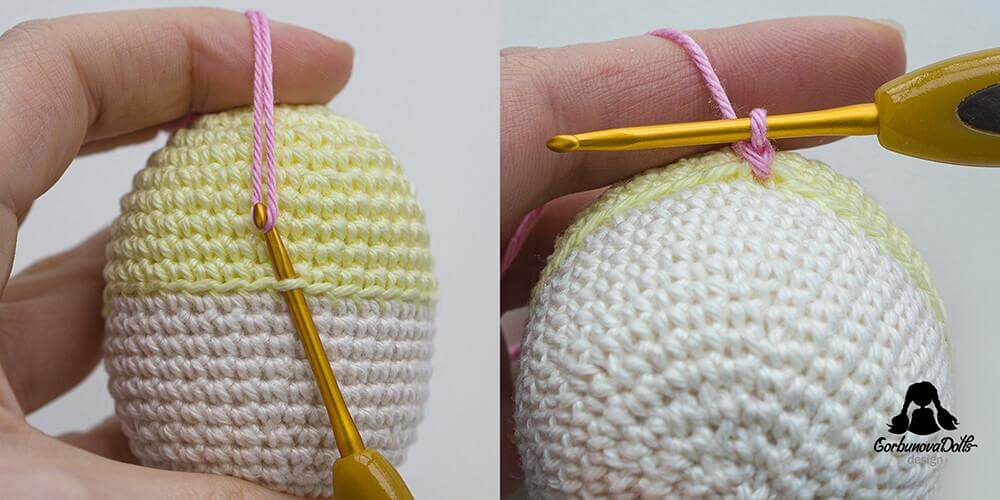
then crochet {1 Sc, 1 Dc, 1 Sc} in this loop (Photo 3), 1 Sl st into next loop (Photo 4),

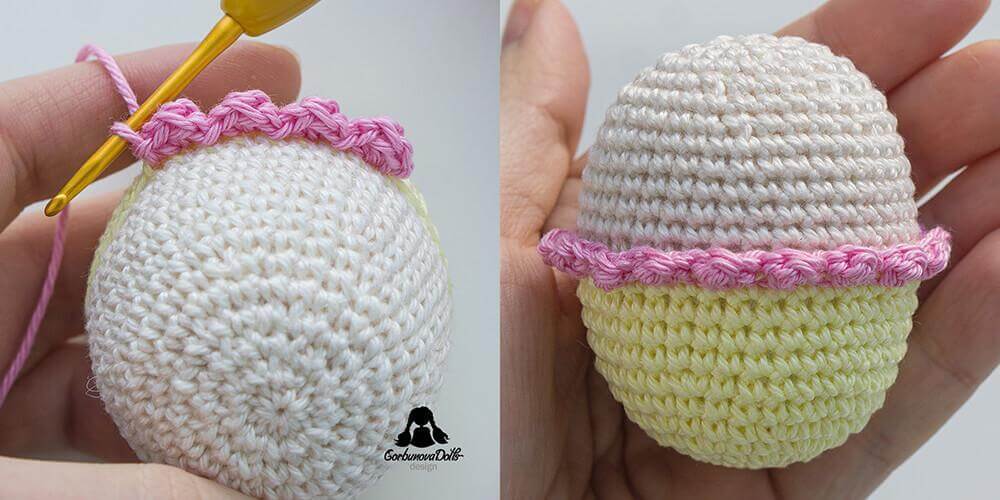
repeat [{1 Sc, 1 Dc, 1 Sc} in one loop, 1 Sl st in next loop] x around to the end (Photo 4). Break the yarn and weave in the end. Ready (Photo 5).
Ear (make 2)
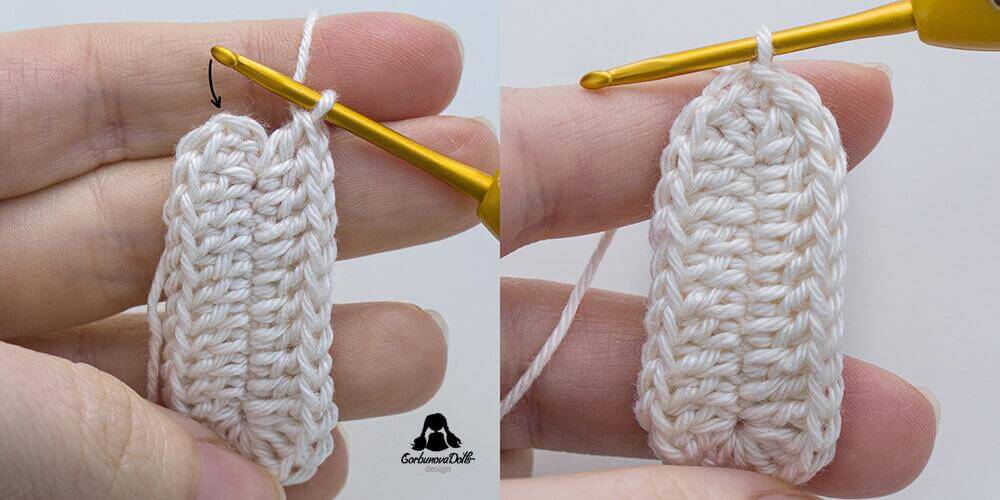
Using white yarn crochet a chain of 13
R1: 2 Dc in 4th chain from the hook, 8 Dc along the chain, 8 Dc into the last chain from the hook. Work along the other side of the foundation ch: 8 Dc, 2 Dc in the chain where we have already crocheted 2 Dc at the beginning of the round, finish with 1 Sl st into the place as shown in Photos 1 and 2 (30). Break the yarn, pull the yarn tail through the last stitch completely and weave in the ends on the wrong side.
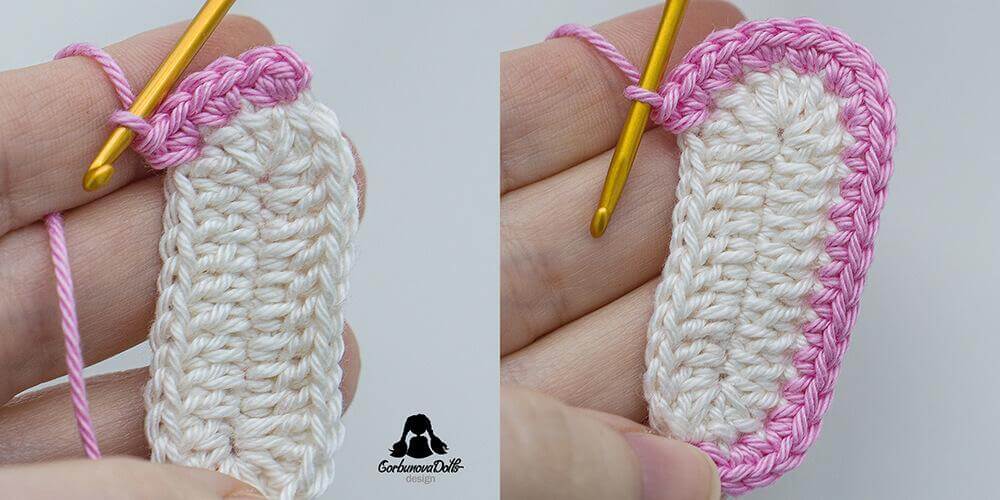
R2: Insert the hook into the slip stitch we have just made, pink yarn over (Photo 3), pull the yarn through this st, crochet Ch 1 and 2 Sc into the same (Photo 4),

then [2 sc into the same st] x 2 (Photo 5), 9 Sc, [2 Sc into the same st] x 6 (Photo 6), 9 Sc, [2 sc into the same st] x 2, 1 Sl st into the 1st sc of the round. Break the yarn, pull the yarn tail through the last stitch completely and weave in the ends on the wrong side.
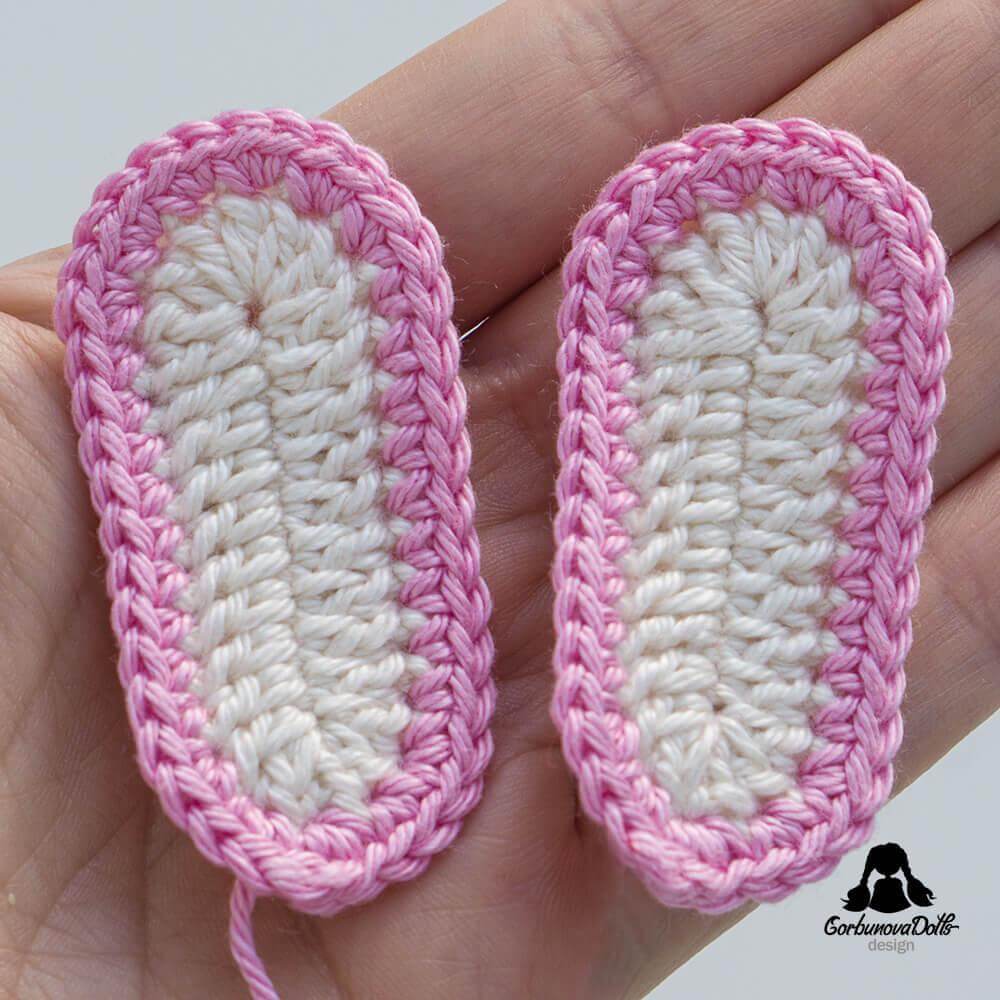
Crochet the second ear, break the yarn, leaving a 8 inches (20 cm) tail and pull the yarn tail through the last stitch completely.
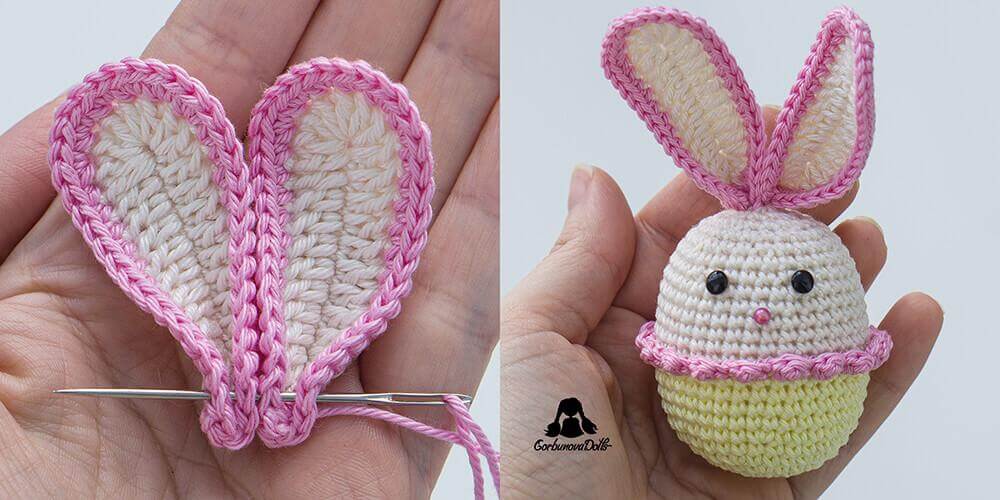
Assembly
Hold the second ear, thread the yarn tail that we left before, fold the ears as shown in Photo 1 and sew them together at the bottom, then sew them to the top of the egg as shown in Photo 2. Hide the yarn tail inside the egg.
Embroidering and Decoration
Try placing the black glass eyes between rounds 17 and 18 with a distance of 4 stitches between them. Mark the nose with a pin on round 16 as shown in Photo 1. Then remove the eyes and embroider eyelashes with 2 strands of black embroidery floss as shown in Photo 2. Glue the eyes on, or alternatively, use embroidery floss in black color to embroider the eyes.

Use 3 strands of pink embroidery floss to embroider a simple stitched nose (Photo 3).

You can add a touch of blush to the cheeks and ears using decorative cosmetics. Sew ribbon bow as shown in photo below.

Congratulations, your easter bunny egg is ready! I hope you have fun. I’d love to see your toy, be sure to tag me @gorbunova.dolls on Instagram. If you are on Facebook join my group Ami & Hook Society and share a photo! If you enjoyed this Easter Egg Crochet Pattern, subscribe for more!
Copyright
©Gorbunovadolls. All rights reserved. This free Easter egg crochet pattern may not be published, resold, reproduced, shared, translated, or altered without prior permission in writing from the author. For more details, please visit the Copyright and Intellectual Property Rights.
Selling Finished Items
The design and pattern are copyright and must not be reproduced for resale! You may sell finished items made from this pattern. For your personal use (non-profit) or for charity purposes you are permitted to make as many items from this pattern as you like.

Comments (0)