
Crochet Macaron – Free Amigurumi Pattern
Learn how to crochet a sweet macaron with this free amigurumi pattern and step-by-step tutorial. This cute crochet macaron is a fun small amigurumi project for handmade gifts, keychains, party favors, Valentine’s Day makes, play food, or adding a tiny dessert detail to your crochet collection.
Before we begin, thank you for visiting GorbunovaDolls – a place for detailed amigurumi patterns, crochet dolls, and cute handmade projects created with care.

Pin this crochet macaron pattern to your crochet board so you can easily find it when you’re ready to make a sweet amigurumi project.
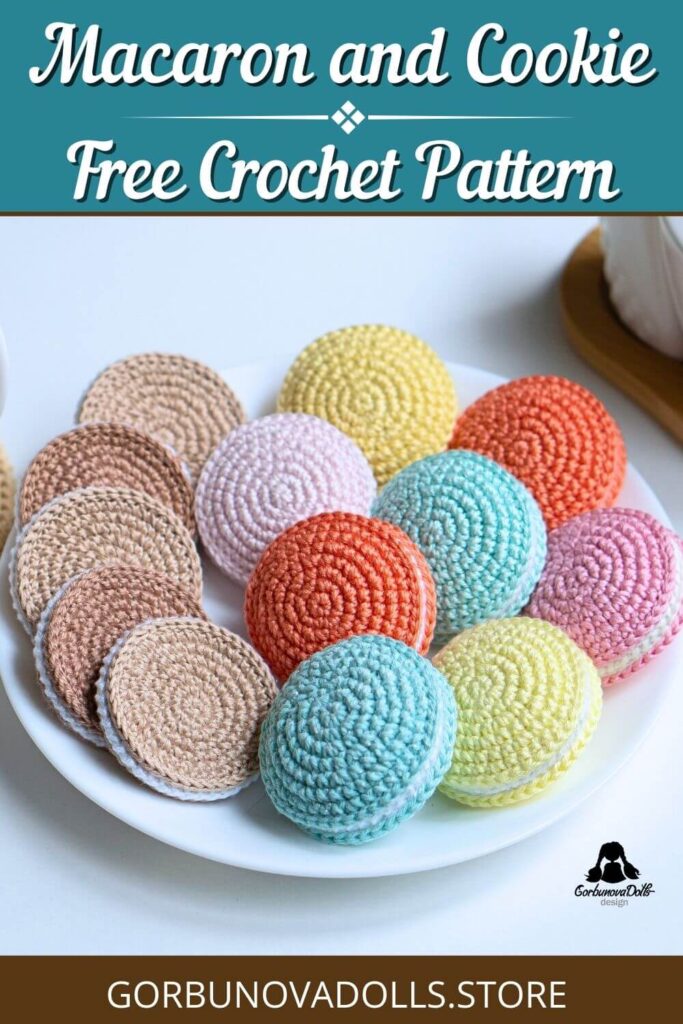
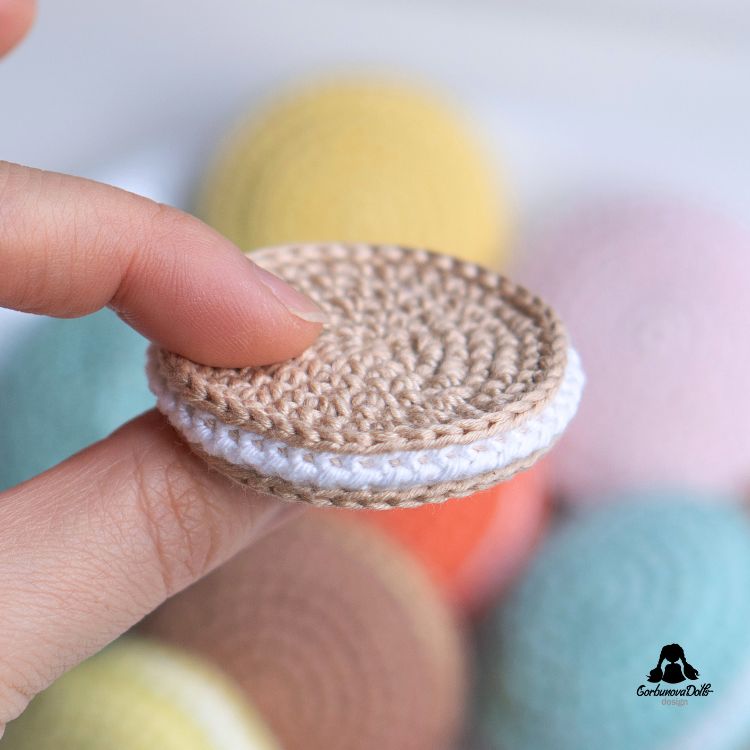
This crochet macaron is made from two round pieces that are joined together, lightly stuffed, and finished with a simple edging. You can also use the same method to make a flat crochet cookie by skipping the stuffing.
The pattern includes detailed step-by-step photos for the special joining method, edging, and assembly. If you enjoy sweet-themed crochet projects, the printable PDF version includes the full macaron pattern in an ad-free format with additional photos.
Pattern Details
- Skill Level: Intermediate
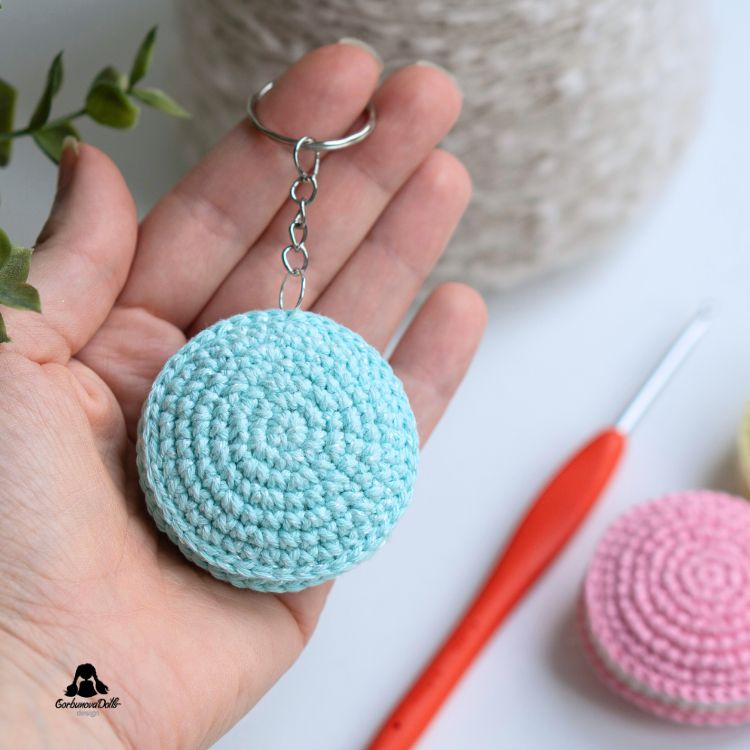
- Finished Size: approximately 5 cm / 2 in across when made with sport weight cotton and the recommended hook size
- Crochet Terms: US terms
- Construction: the macaron is made from two round pieces, joined together, lightly stuffed, and finished with slip-stitch edging
- Best For: keychains, play food, party favors, Valentine’s Day gifts, sweet-themed decorations, doll props, and cute amigurumi projects
- PDF Available: yes, with extra step-by-step photos in a printable ad-free format
- Pattern Design & Tutorial Photos: GorbunovaDolls
Materials You’ll Need
This section may contain affiliate links, including Amazon affiliate links. If you purchase through these links, I may earn a small commission at no extra cost to you. Thank you for supporting my free patterns.
For my crochet macarons, I used Schachenmayr Catania Originals – a sport weight / fine (2) yarn made of 100% cotton. Each skein is 50 g / 125 m / 137 yds.
You can use any color for the macaron shell and white or cream-colored yarn for the filling. You can also experiment with pastel colors, dessert-inspired shades, or playful bright colors to make each macaron unique.
If you want to use a different yarn, choose a smooth cotton or cotton-blend yarn that gives you neat, defined stitches. The Yarn Substitution Tool is a helpful resource for finding yarns with a similar weight, fiber content, and texture.
You will need:
- sport weight / fine cotton yarn in shell color
- white or cream yarn for the filling
- 2.5 mm crochet hook for classic V-shaped single crochet
- 3 mm crochet hook if using the X-shaped single crochet stitch technique
- fiberfill stuffing
- yarn needle
- scissors
- stitch marker
- optional: split ring or keychain clasp if you want to turn the macaron into a keychain
Note: For help choosing between classic V-shaped single crochet and X-shaped single crochet, see my X-shaped single crochet stitch tutorial.
Gauge and Size Notes
Gauge is not critical for this pattern. The most important thing is to keep your stitches neat and tight enough so the stuffing does not show through.
With Schachenmayr Catania Originals, the finished macaron measures approximately 5 cm / 2 in across. You can make a larger or smaller macaron by changing your yarn weight, hook size, or both.
Crochet Abbreviations Used in This Pattern
This pattern is written in standard US crochet terms. You can also check my Crochet Abbreviations guide if you need help with any of the stitches.
| Abbreviation | Meaning |
|---|---|
| blo/flo | back loop only / front loop only (see tutorial) |
| ch/chs | chain/chains |
| inc | increase (two single crochets in one stitch) |
| sc | single crochet |
| sk | skip |
| sl st | slip stitch |
| st/sts | stitch/stitches |
| […] x | repeat the instructions in brackets x times |
| (…) | total number of stitches made in the current round |
Pattern Notes
- The macaron is made from two round crochet pieces.
- Each round piece is finished with a special needle-formed stitch to create a flatter, neater circle.
- Leave a yarn tail about 20 cm / 8 in long when making the magic ring.
- The needle-formed stitch is skipped in the following rounds unless otherwise stated.
- The two pieces are joined with a yarn needle and lightly stuffed before closing.
- The edging is worked into the remaining front loops with slip stitches.
- The cookie variation is made the same way, but without stuffing.
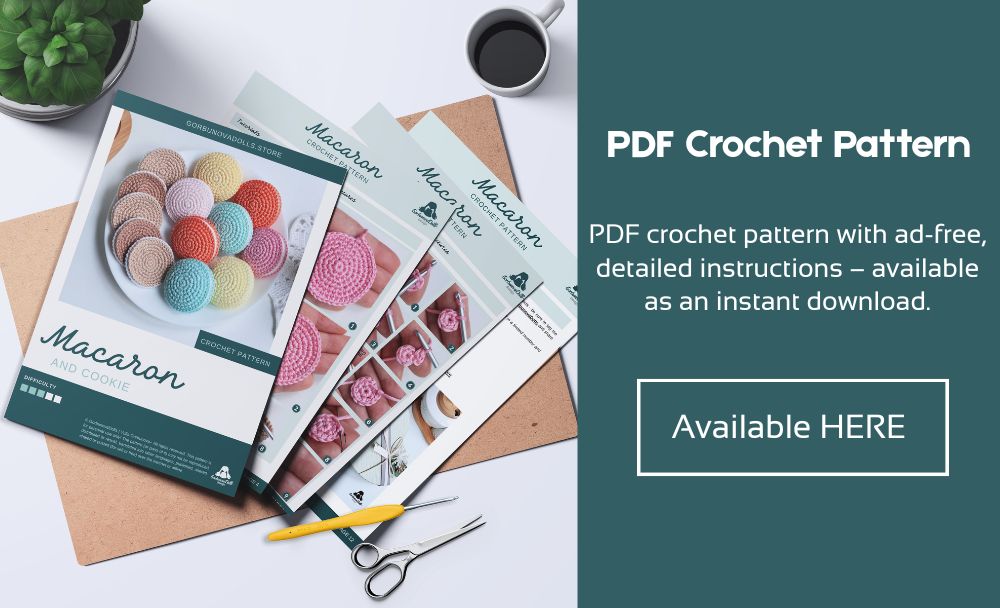
Get the Printable PDF Pattern
Prefer to crochet offline? The printable PDF version of this crochet macaron pattern includes the full instructions in a clean, ad-free format that you can download, save, print, and keep forever.
Inside the PDF, you’ll also find many more step-by-step photos to guide you through the process.
If you enjoy this free pattern, you can support my work by purchasing the ad-free PDF version from my shop. Your support helps me continue creating detailed free crochet patterns. Thank you!
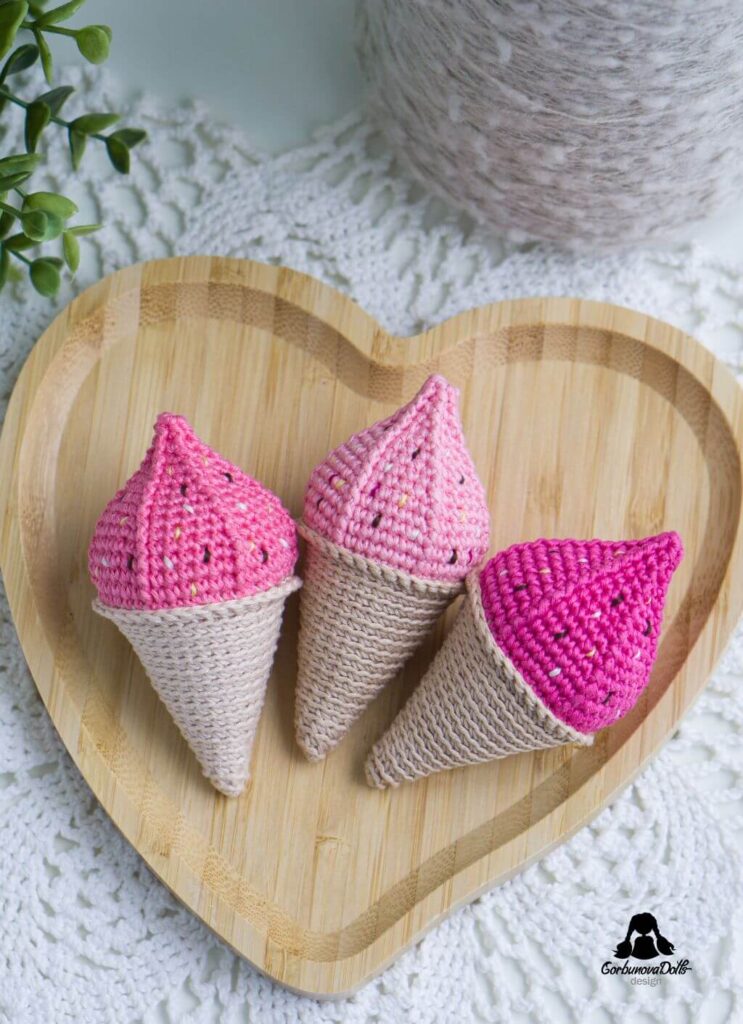
Love sweet-themed crochet patterns?
The crochet ice cream pattern is a perfect match for your macaron if you want to make a cute dessert-themed set.
Love detailed amigurumi patterns?
If you enjoy cute crochet projects like this one, you may also love my premium amigurumi doll patterns. Each PDF pattern is carefully designed with clear step-by-step instructions, helpful photos, and a polished finished result in mind.


Pattern Instructions
Macaron Pieces
Start with the color for the macaron shell.
Note: Since most people are used to working the V-shaped single crochet stitch, the instructions are written using this stitch. If you decide to use the X-shaped single crochet stitch, use “yarn under” instead of “yarn over” (see tutorial).
To crochet a flatter round piece without a visible bump from spiral rounds, we will finish each round using the other end of the yarn in the final step of the last stitch. When making the magic ring, leave a tail about 20 cm / 8 in long.
Round 1:
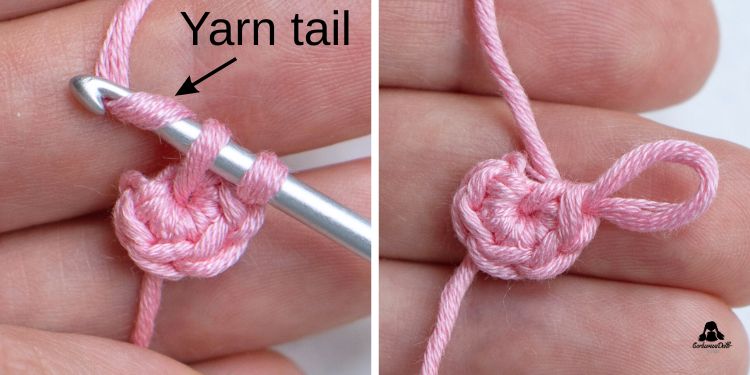
- Into the magic ring, work 4 sc, then pull the yarn tail to close the ring.
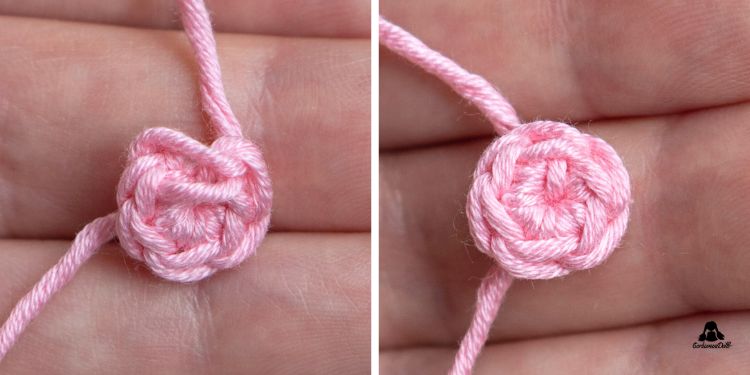
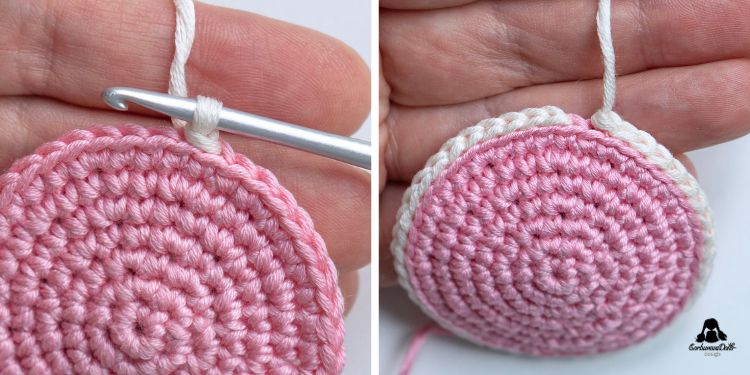
- Then, work one more single crochet, but finish it using the yarn tail. To do this, at the final step of the stitch, when you have two loops on the hook, yarn over with the yarn tail (see Photo 1), and pull through both loops on the hook (see Photo 2).
- Pull the yarn completely through the loop and thread the yarn tail onto a needle. Insert the needle under the first sc stitch (see Photo 3). Pull the yarn completely through. Then insert the needle back into the same stitch the yarn end is coming from, but this time insert it under the back loop and back bump only (see Photo 4).
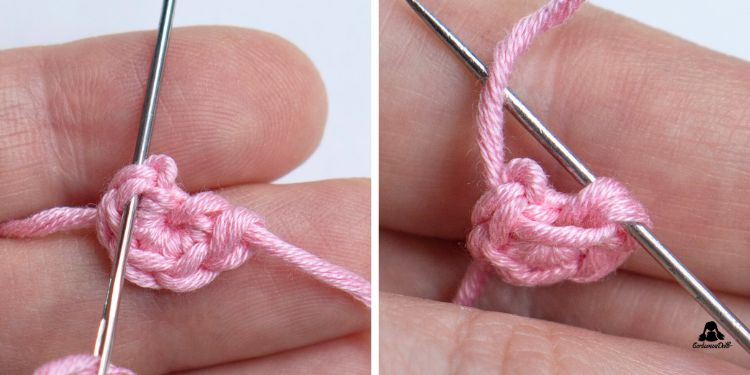
- Pull the yarn completely through. Tighten the stitch just enough so that the join resembles a regular stitch (see Photos 5 and 6).
Stitch count: 6 stitches.
Round 2:
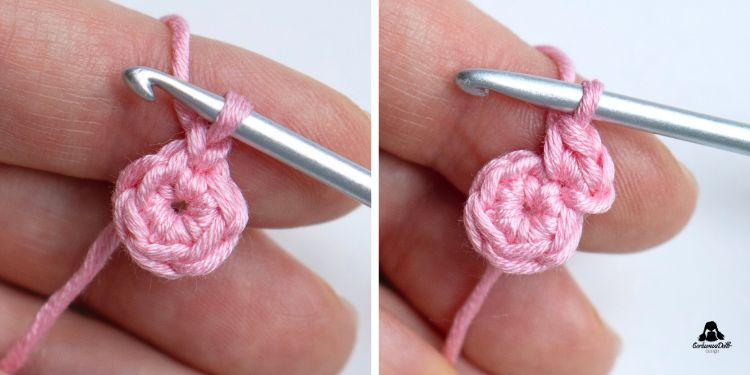
- Insert the hook into the needle-formed stitch, yarn over with the working yarn, and pull the yarn through. Yarn over and pull through the loop on the hook (see Photo 7).
- In the same stitch, make 2 sc (increase, see Photo 8).
- Crochet inc in each stitch around, finishing the last sc with the yarn tail.
- Pull the yarn completely through the stitch and thread the yarn tail onto a needle. Finish the round again with a needle-formed stitch. From this round on, this stitch will no longer count, and you will skip it in the following rounds without working into it.
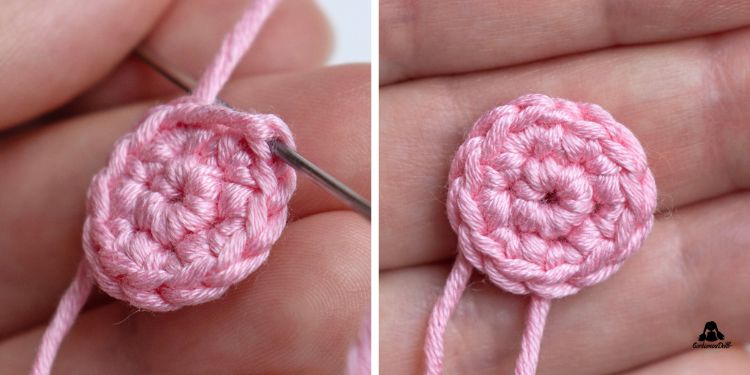
- Insert the needle under the first sc stitch. Pull the yarn completely through. Then insert the needle back into the same stitch the yarn end is coming from, but this time insert it under the back loop and back bump only (see Photo 9). Pull it through and tighten the stitch very firmly (see Photo 10).
Stitch count: 12 stitches (13 including the needle-formed stitch).
Round 3:
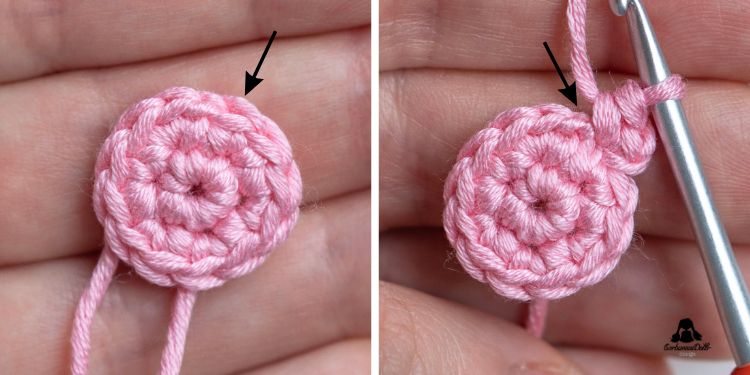
- Insert the hook into the stitch before the needle-formed stitch (see Photo 11, black arrow), yarn over with the working yarn, and pull the yarn through. Yarn over again and pull the yarn through the loop on the hook.
- In the same stitch, make 2 sc.
- Skip the needle-formed stitch (see Photo 12, black arrow), and tighten it again if needed. In the next stitch, make 1 sc.
- Next, repeat [inc, 1 sc] 5 times around. Finish the last sc with the yarn tail.
- Pull the yarn completely through the stitch, thread the yarn tail onto a needle, and make a needle-formed stitch. Tighten the stitch very firmly.
Stitch count: 18 stitches (19 including the needle-formed stitch).
Round 4:
- Insert the hook into the stitch before the needle-formed stitch, yarn over with the working yarn, and pull the yarn through. Yarn over again and pull the yarn through the loop on the hook.
- In the same stitch, make 2 sc.
- Skip the needle-formed stitch and tighten it again if needed. Make 1 sc in each of the next 2 stitches.
- Next, repeat [inc, 2 sc] 5 times around. Finish the last sc with the yarn tail.
- Pull the yarn completely through the stitch, thread the yarn tail onto a needle, and make a needle-formed stitch. Tighten the stitch very firmly.
Stitch count: 24 stitches (25 including the needle-formed stitch).
Round 5:
- Insert the hook into the stitch before the needle-formed stitch, yarn over with the working yarn, and pull the yarn through. Yarn over again and pull the yarn through the loop on the hook.
- In the same stitch, make 2 sc.
- Skip the needle-formed stitch and tighten it again if needed. Make 1 sc in each of the next 3 stitches.
- Next, repeat [inc, 3 sc] x 5 times around. Finish the last sc with the yarn tail.
- Pull the yarn completely through the stitch, thread the yarn tail onto a needle, and make a needle-formed stitch. Tighten the stitch very firmly.
Stitch count: 30 stitches (31 including the needle-formed stitch).
Round 6:
- Insert the hook into the stitch before the needle-formed stitch, yarn over with the working yarn, and pull the yarn through. Yarn over again and pull the yarn through the loop on the hook.
- In the same stitch, make 1 sc.
- Skip the needle-formed stitch and tighten it again if needed. Make 1 sc in each of the next 3 stitches.
- In the next st, make inc.
- Next, repeat [4 sc, inc] 5 times around. Finish the last sc with the yarn tail.
- Pull the yarn completely through the stitch, thread the yarn tail onto a needle, and make a needle-formed stitch. Tighten the stitch very firmly.
Stitch count: 36 stitches (37 including the needle-formed stitch).
Round 7:
- Insert the hook into the stitch before the needle-formed stitch, yarn over with the working yarn, and pull the yarn through. Yarn over again and pull the yarn through the loop on the hook.
- In the same stitch, make 1 sc.
- Skip the needle-formed stitch and tighten it again if needed. Make 1 sc in each of the next 2 stitches.
- In the next st, make inc.
- Next, repeat [5 sc, inc] 5 times around.
- Make 1 sc in each of the next 2 stitches. Finish the last sc with the yarn tail.
- Pull the yarn completely through the stitch, thread the yarn tail onto a needle, and make a needle-formed stitch. Do not tighten the stitch this time, as we will count it as a regular stitch.
Stitch count: 43 stitches.
Fasten off.
Round 8:
- Insert the hook into any stitch of the piece, back loop only. With white yarn, yarn over and pull the yarn through.
- Insert the hook into the next stitch, back loop only, yarn over and pull through. You will have two loops on the hook.
- Pull the last loop through the first loop on the hook. The first slip stitch is now complete (see Photo 13).
- Continue making slip stitches in the back loops only around.
- When you make the slip stitch into the last stitch (see Photo 14), cut the yarn, leaving a 10 cm / 4 in tail. Pull the yarn completely through the stitch and thread the yarn tail onto a needle.
- Insert the needle under the first slip stitch (see Photo 15) and pull the yarn completely through. Then insert the needle back into the same stitch the yarn end is coming from, but this time insert it under the back loop and back bump only (see Photo 16). Tighten the stitch just enough so that it looks like a regular stitch, then fasten off.
The first piece is ready. Crochet the second one the same way, from Round 1 to Round 8.
Joining the Pieces
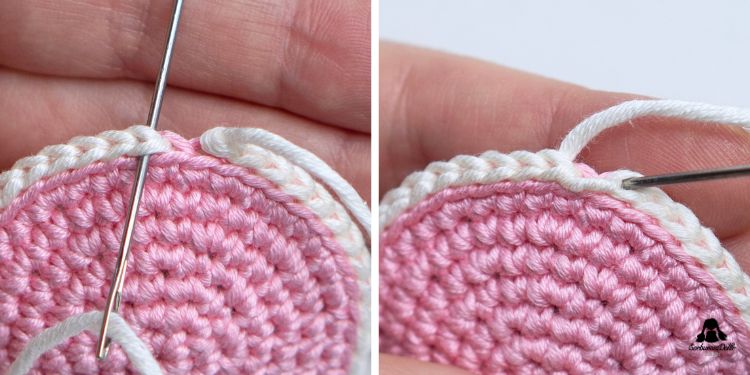
- Thread the needle with white yarn, then insert it into any stitch of one of the pieces from the wrong side (see Photo 1). Pull the yarn through.
- Then insert the needle into any stitch of the second piece (see Photo 2), and pull the yarn through firmly. The crocheted pieces should be placed with the wrong sides facing each other.
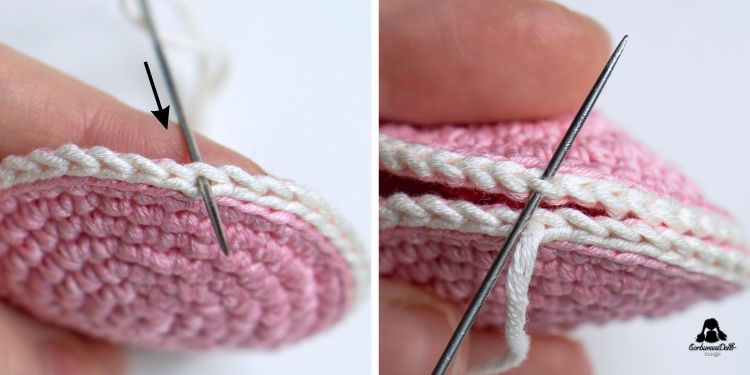
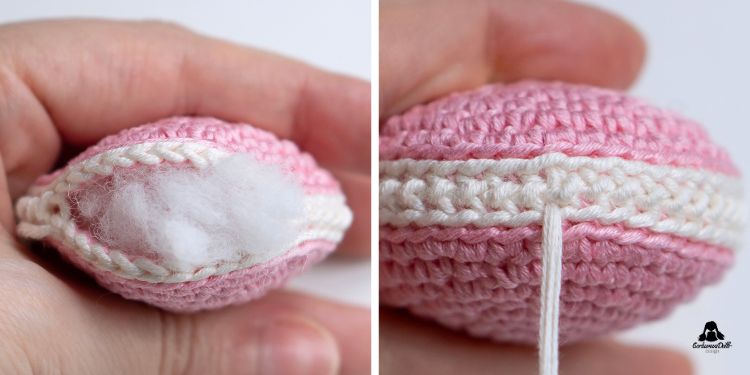
- Continue sewing the pieces together by inserting the needle into the inner loops, the ones closest to each other, all the way around the macaron, as shown in Photos 3, 4, and 5.
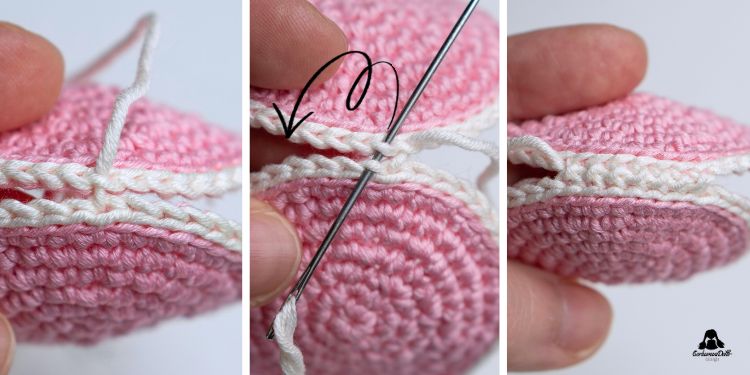
- Before finishing the macaron, add fiberfill stuffing. Complete the sewing and fasten off (see Photos 6 and 7).
Edging
- You will have front loops left on both pieces. Now crochet an edging along them using slip stitches.
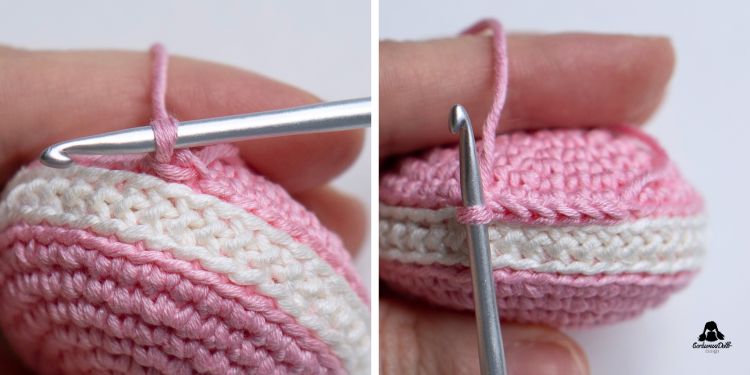
- Insert the hook into any front loop of the macaron, yarn over with the shell color yarn, and pull through.
- Insert the hook into the next front loop, yarn over, and pull through again. You will have two loops on the hook.
- Pull the last loop through the first loop on the hook. The first slip stitch is now complete (see Photo 1).
- Continue making slip stitches in the front loops all the way around (see Photo 2).
- When you make the slip stitch into the last stitch, cut the yarn, leaving a 10 cm / 4 in tail.
- Pull the yarn completely through the last stitch and thread the yarn tail onto a needle.
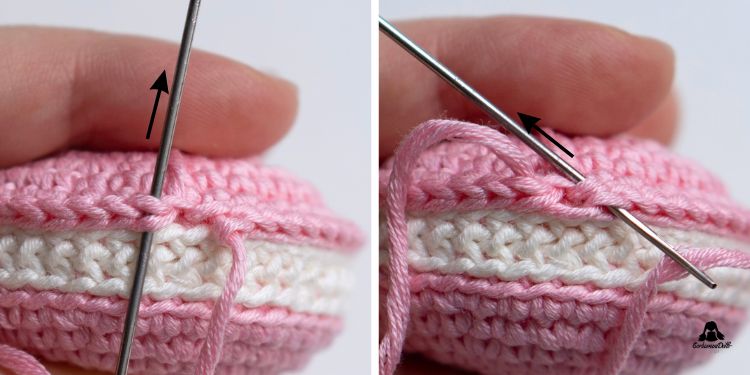
- Insert the needle under the first slip stitch (see Photo 3) and pull the yarn completely through. Then insert the needle back into the same stitch the yarn end is coming from, but this time insert it under the back loop and back bump only (see Photo 4). Pull the yarn through and tighten the stitch just enough so that it resembles a regular slip stitch. Fasten off.
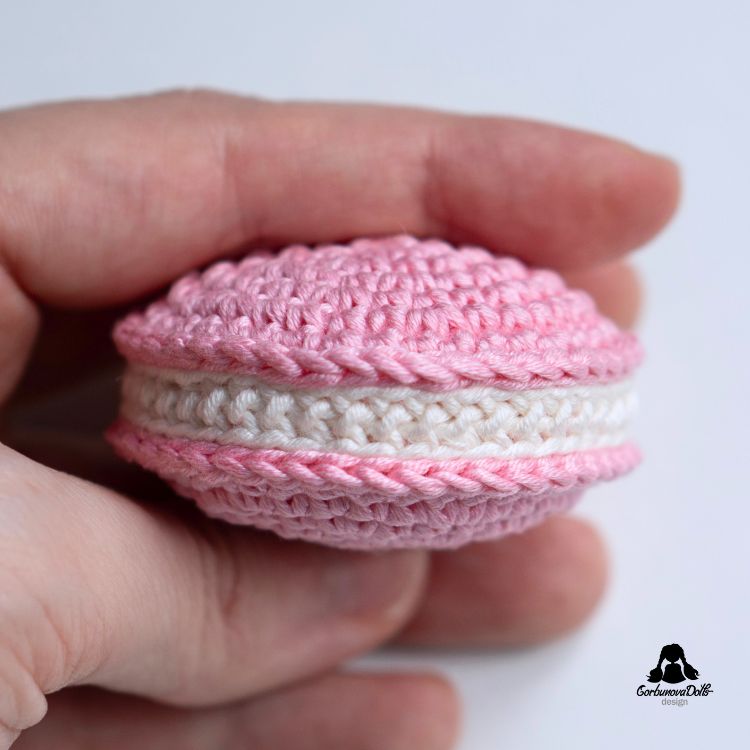
- Repeat the same process with the front loops of the second piece. Your macaron is now complete!
The cookie is crocheted in the same way. The only difference is that you do not add stuffing when sewing the pieces together.
Your Crochet Macaron Is Finished!
Congratulations – your crochet macaron is ready! This sweet little amigurumi dessert is perfect as a keychain, party favor, play food, Valentine’s Day gift, doll prop, or cute handmade decoration.
If you have any questions while following this tutorial, feel free to contact me and I’ll do my best to help.
I hope you enjoyed this free crochet macaron pattern. If you make your own macaron, I’d love to see it! Tag me on Instagram @gorbunova.dolls or share your photo in my Facebook group, Ami & Hook Society.
Want the printable version?
The ad-free PDF includes this crochet macaron pattern in a clean printable format with extra step-by-step photos to make the process easier to follow.
Want to crochet something more detailed?
Explore my premium amigurumi doll patterns – beautifully structured PDF patterns with clear instructions, helpful step-by-step photos, and charming finished dolls you’ll be proud to make.
Copyright
© GorbunovaDolls. All rights reserved. This macaron crochet pattern may not be published, resold, reproduced, shared, translated, or altered without prior written permission from the author. For more details, please visit Copyright and Intellectual Property Rights.
Selling Finished Items
You may sell finished items made from this pattern. You are welcome to make as many finished macarons and cookies as you like for personal use, charity, or small handmade sales. However, the pattern itself may not be copied, reproduced, redistributed, translated, or resold.


Comments (0)