
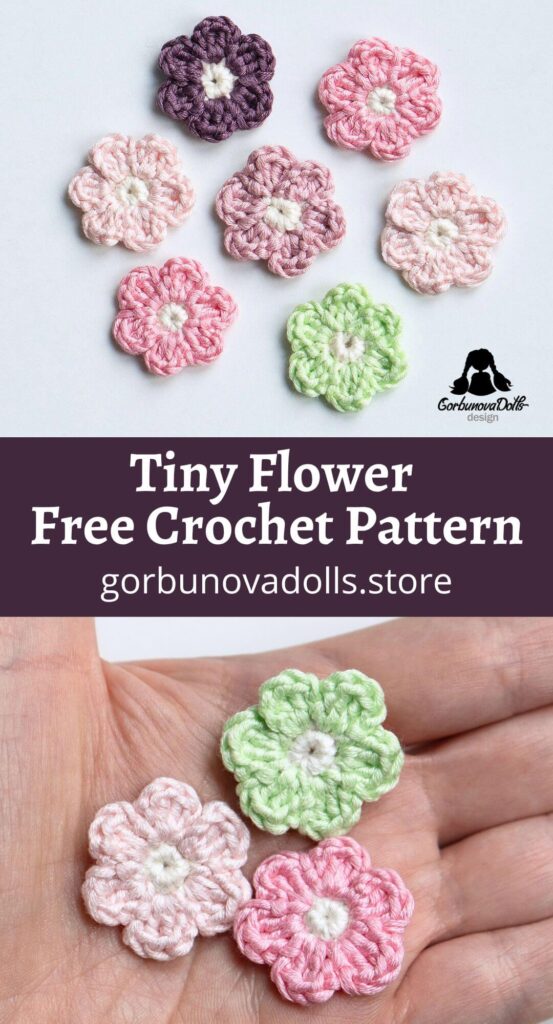
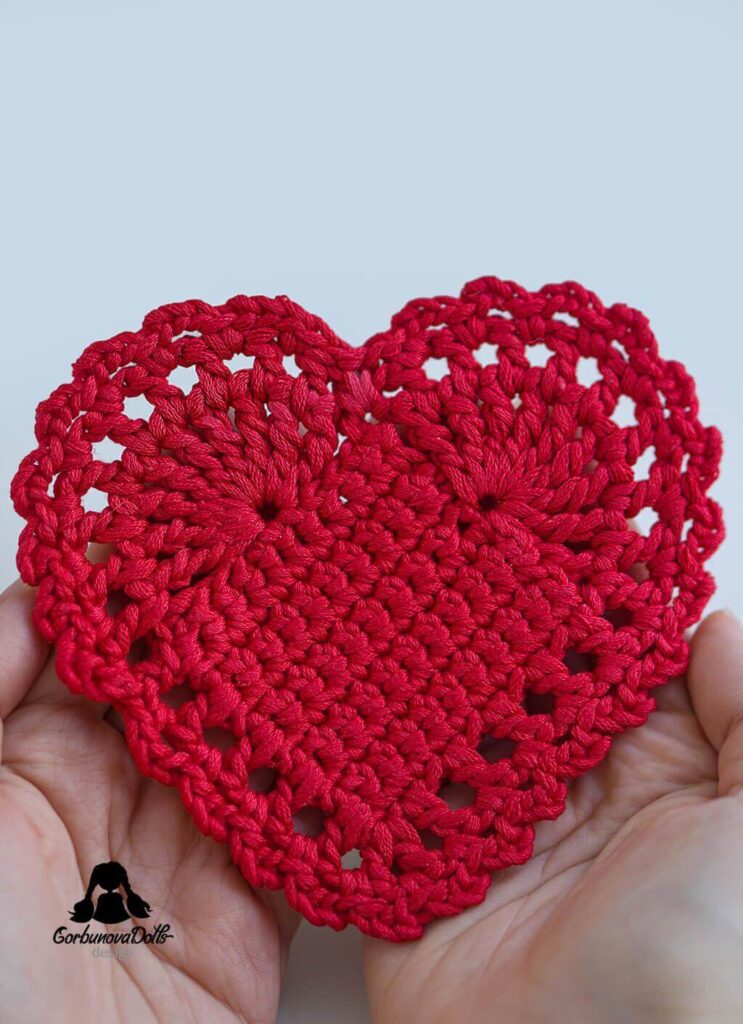
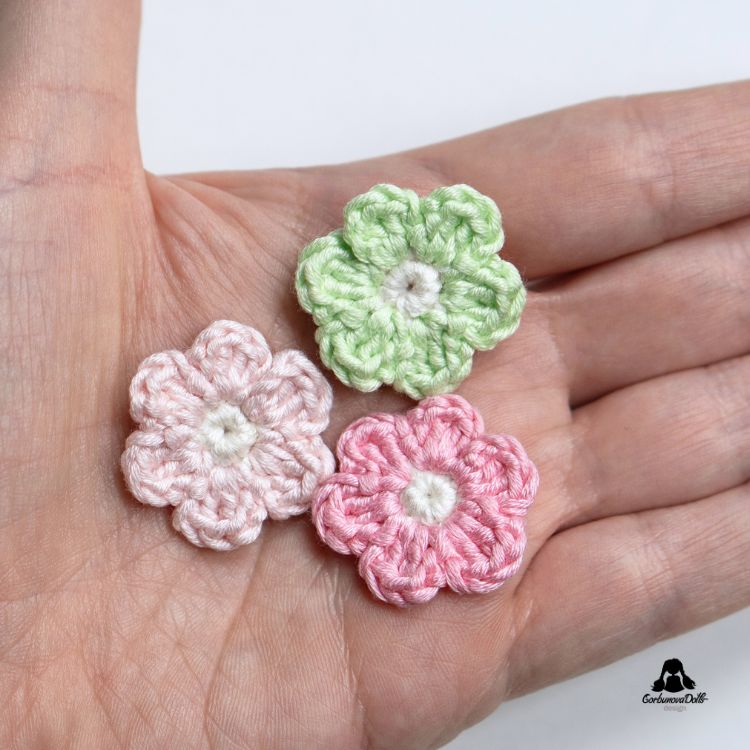
Crochet Tiny Flower Free Pattern
🌸 Brighten someone’s day with a sweet handmade touch! This free Crochet Tiny Flower Pattern is perfect for creating adorable appliqués that you can use as embellishments, gifts, or decorations for special occasions like Valentine’s Day. With simple, easy-to-follow instructions, you’ll crochet your first flower in minutes.
Just choose your favorite yarn and matching hook, and let’s get started! 🌼
This post may contain affiliate or referral links. Please read the Affiliate Disclosure for more information.
Please take a moment to pin my image before we begin – it really helps! Thank you so much!
Materials used in the Crochet Tiny Flower pattern
- Charm by Vita Cotton – this is a sport weight (fine) yarn, 100% mercerized cotton, 105 meters (115 yds) per 50 grams (1.75 oz). If you’re searching for substitutes, consider using the Yarn Substitution Tool. It can help you find yarns with comparable qualities. Colors used: white and any additional colors for the petals.
- Crochet hook size 3.00 mm (US: D, UK: 11)
- Scissors, yarn needle
You can use any yarn with a matching hook, but for best definition and structure, cotton yarn is highly recommended.

Gauge and Measurements
The finished flower measures about 1” (2.7 cm) in diameter. Gauge is not important for this pattern. You can easily adjust the flower’s size by using a different hook or yarn thickness.


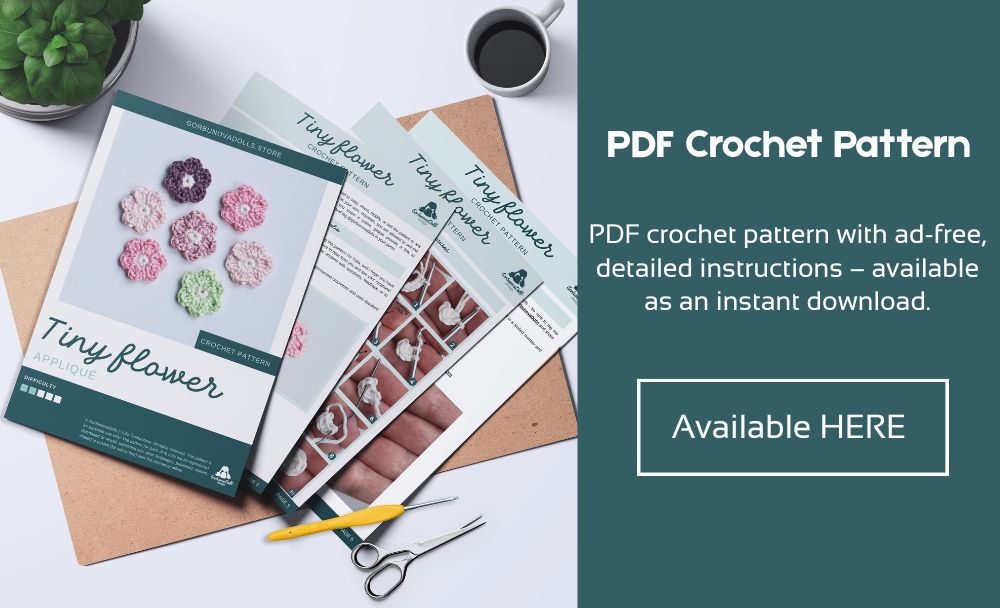
PDF Pattern
The PDF Crochet Tiny Flower pattern is a great solution for those who want to print the instructions and work offline, or simply want to support my work. In the PDF file, you’ll find many more step-by-step photos to guide you through the process. You can find the PDF pattern in my shop. Your support helps me continue creating new free patterns!
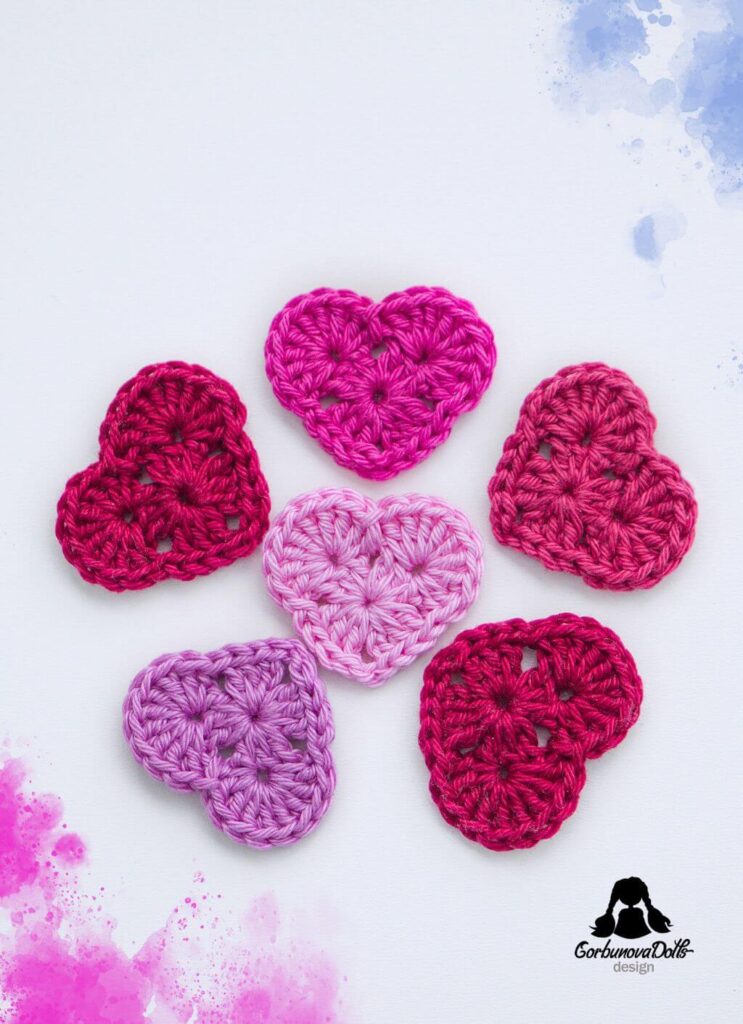
Love crocheting for St. Valentine’s Day? Check out these patterns below.
How to crochet the tiny flower
Start with white yarn.
Round 1
- Into the magic ring, work 4 single crochets, then pull the yarn tail to close the ring.
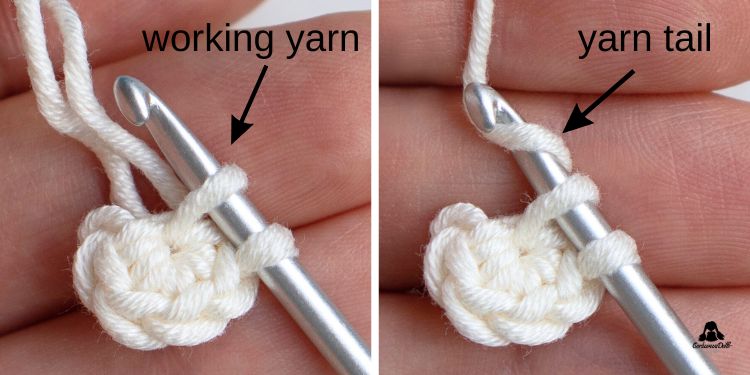
- Into the magic ring, work 1 single crochet, but instead of using the working yarn to finish it, use the yarn tail.
To do this: insert the hook into the magic ring, yarn over with working yarn, and pull through (photo 1). You now have two loops on the hook. Yarn tail over (photo 2), and pull through the two loops on the hook.
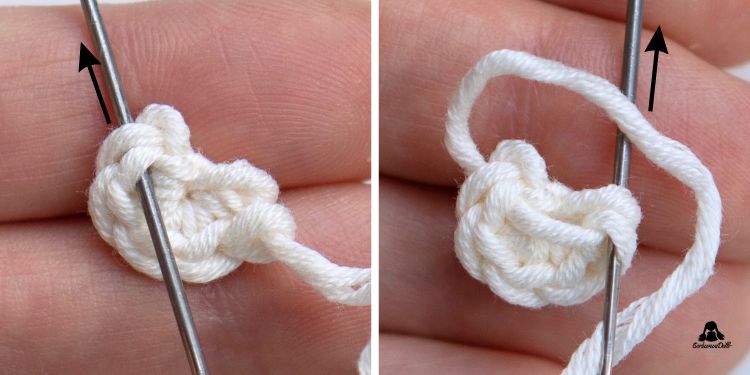
Photos 1 and 2 - Pull the yarn completely through the loop, thread the needle, and make a stitch with the needle.
To do this: insert the needle under the first single crochet stitch (photo 3). Pull the yarn completely through.
Then insert the needle back into the same stitch the yarn end is coming from, but only under the back loop and back bump (photo 4). Pull the yarn completely through.Photos 3 and 4 - Tighten the stitch just enough so that the join resembles a regular stitch. Weave in all ends on the wrong side.
Photos 5 and 6
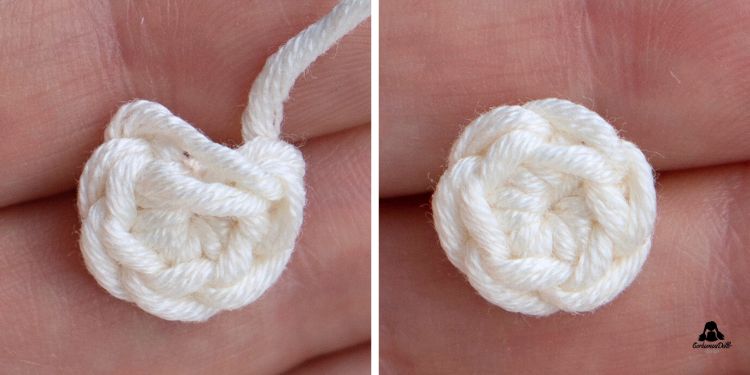
Stitch count: 6 stitches.
Note: instead of 6 single crochets, you can make 5 – that way, your flower will have 5 petals.
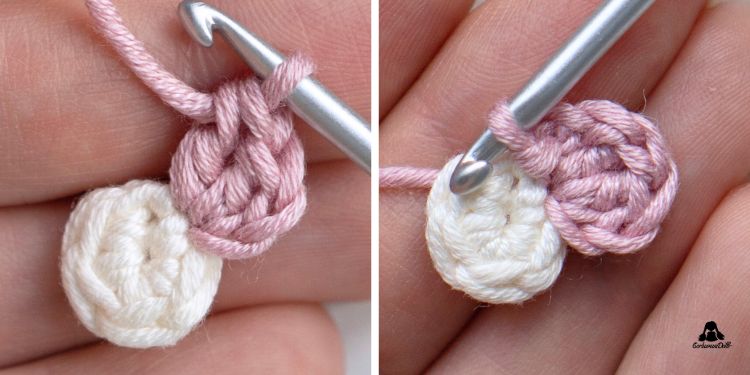
Round 2
- To join the new color, insert your hook into any stitch of the crochet piece, yarn over with the other color, and pull it through. Then, chain 2.
- In the same stitch, make 2 double crochets (see photo 7). Then, chain 2 and finish with a slip stitch in the same stitch (see photo 8).
Photos 7 and 8 - Chain 2 (see photo 9). In the next stitch, make 2 double crochets. Then, chain 2 and make a slip stitch in the same stitch (see photo 10).
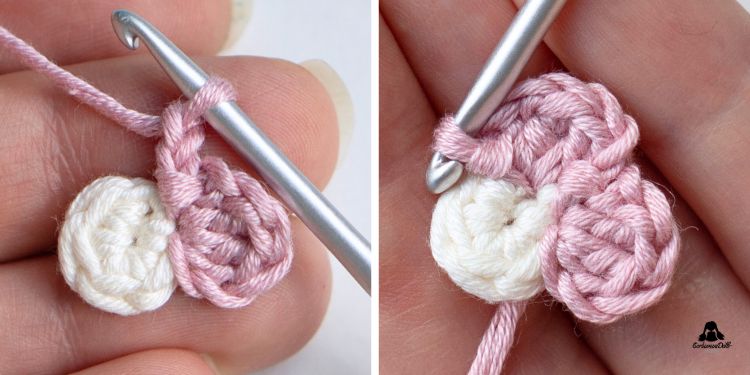
Photos 9 and 10 - Repeat this combination in each stitch until the end.
- Pull the yarn completely through the last slip stitch (see photo 11), and thread the needle. Guide the yarn to the wrong side and weave in ends.
- Your flower is complete (photo 12)!
Photos 11 and 12
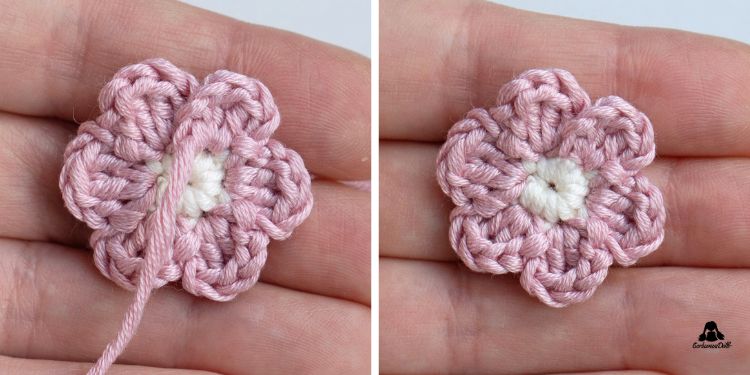
You’re Done!
Congratulations! Your flower is ready! I hope you had fun making it! I’d love to see your project, be sure to tag me @gorbunova.dolls on Instagram. If you are on Facebook join my group Ami & Hook Society and share a photo! If you enjoyed this pattern, subscribe for more!
If you have any questions about the Crochet Tiny Flower pattern, please contact me here, and I’ll get right back to you.
Copyright
©Gorbunovadolls. All rights reserved. This crochet tiny flower pattern may not be published, resold, reproduced, shared, translated, or altered without prior permission in writing from the author. For more details, please visit Copyright and Intellectual Property Rights.
Selling Finished Items
The design and pattern are copyrighted and must not be reproduced for resale! You may sell finished items made from this pattern. You are welcome to make as many items as you like for personal use or charity. However, commercial reproduction of the pattern itself is strictly prohibited.


Comments (0)