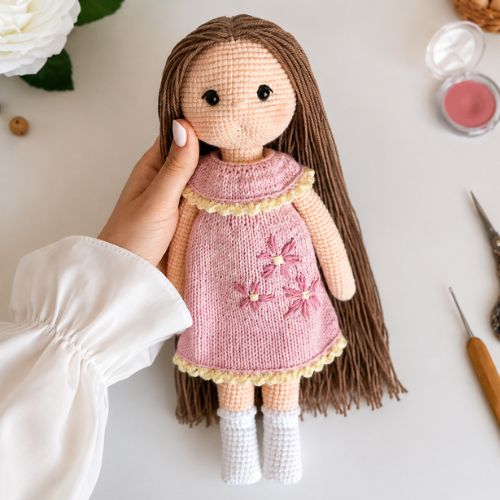
Crochet Base Doll Arishka – Free Amigurumi Doll Pattern
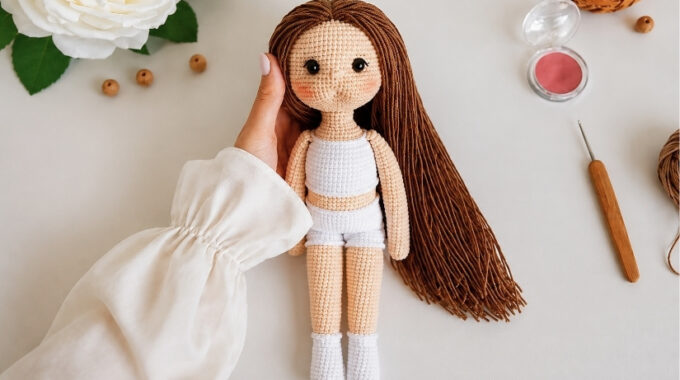
Learn how to crochet a simple base doll with this free amigurumi doll pattern. This crochet base doll is a lovely starting point for making handmade dolls, practicing doll body construction, or creating your own outfits, hairstyles, and accessories.
Before we begin, thank you for visiting GorbunovaDolls – a place where I share detailed amigurumi patterns, crochet doll designs, and selected free tutorials from talented designers, translated with permission.

Pin this crochet base doll pattern to your crochet board so you can easily find it when you’re ready to make a handmade amigurumi doll.
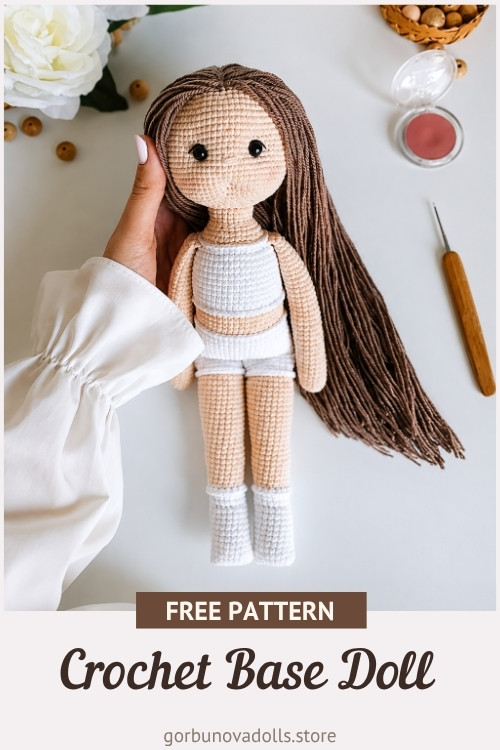
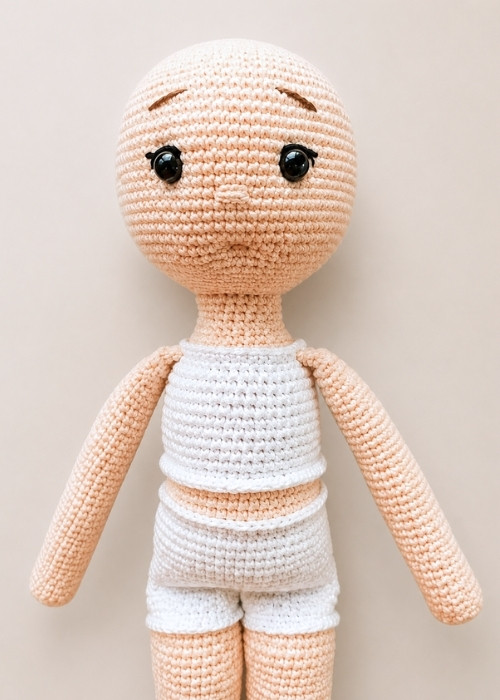
This free crochet doll pattern includes written instructions for the head, ears, legs, body, arms, basic facial details, assembly, and a step-by-step hair attachment tutorial with my own photos. The finished doll is a base-style amigurumi doll with built-in simple underwear and socks, safety eyes, embroidered eyelashes, a small embroidered nose, and long yarn hair.
Designer Credit
This free crochet base doll pattern was originally designed by @natali_lit_toys and is shared here with her kind permission.
I translated and prepared the instructions in English so more crocheters can enjoy this lovely doll pattern. Please do not sell, copy, repost, translate, or redistribute this pattern without permission from the original designer.
If you enjoy this free English translation, you can support my work with a small Ko-fi donation. Thank you!
Pattern Details
- Skill Level: Intermediate
- Finished Size: Approximately 28-29 cm / 11-11.4 in when made with the recommended yarn and hook
- Crochet Terms: US terms
- Construction: The legs are crocheted separately, then joined and continued into the body; the socks and simple underwear are created with color changes; the head, ears, and arms are made separately and sewn on, with facial details and hair added during finishing
- Best For: Crochet doll lovers, amigurumi doll bodies, handmade doll bases, outfit practice, doll customization, and free doll pattern collections
- Original Designer: @natali_lit_toys
- English Translation: GorbunovaDolls
Materials You’ll Need
This section may contain affiliate links, including Amazon affiliate links. If you purchase through these links, I may earn a small commission at no extra cost to you. Thank you for supporting my work on free crochet tutorials and English pattern translations.
For the doll body and the built-in underwear details, the original sample was made with YarnArt Jeans – a Sport/Fine weight cotton-acrylic blend made of 55% cotton and 45% acrylic. Each skein is 50 g / 160 m / 175 yds.
For the hair, you can use any soft 100% acrylic yarn with a similar thickness, approximately 200 m / 218 yds per 50 g. YarnArt Jeans can also be used if you prefer a smooth cotton-blend look for the hair.
If you want to use a different yarn, choose smooth yarn that gives you neat, tight stitches for amigurumi. The Yarn Substitution Tool is a helpful resource for finding yarns with a similar weight, fiber content, and texture.
Yarn colors used in the original doll:
- YarnArt Jeans 62 – snow white
- YarnArt Jeans 73 – peach / skin color
- Black yarn or embroidery thread – for embroidering the eyelashes
- Soft 100% acrylic yarn – cappuccino, brown, or any hair color you like; approximately 200 m / 218 yds per 50 g
You will also need:
- 1.75 mm crochet hook for the original sample; you may prefer a 2-2.5 mm hook if it gives you a neat, dense amigurumi fabric with your yarn
- 8 mm safety eyes
- fiberfill stuffing
- long yarn needle for sewing and embroidery
- scissors
- stitch marker
- blush for the cheeks
Gauge and Size Notes
The original doll was crocheted with X-shaped single crochet stitches, which create a neat, dense amigurumi fabric. With the recommended yarn and a 1.75 mm hook, the finished doll measures approximately 28–29 cm / 11–11.4 in.
My personal hook recommendation: the original 1.75 mm hook is quite small for this yarn. As an experienced doll maker, I would personally choose a slightly larger hook, such as 2 mm or 2.5 mm, depending on your tension and how tight your stitches are. The most important thing is to create a neat, dense fabric so the stuffing does not show through.
If you usually crochet with standard single crochet stitches, choose the hook size that gives you a firm amigurumi fabric with your yarn. Please note that using a larger hook will make the finished doll larger than the original.
Crochet Abbreviations Used in This Pattern
This pattern is written in standard US crochet terms. You can also check my Crochet Abbreviations guide if you need help with any of the stitches.
| Abbreviation | Meaning |
|---|---|
| blo | back loop only (see tutorial) |
| ch/chs | chain/chains |
| dec | decrease |
| flo | front loop only |
| hdc | half double crochet |
| inc | increase (two single crochets in one stitch) |
| sc | single crochet |
| sl st | slip stitch |
| st/sts | stitch/stitches |
| […] x | repeat the instructions in brackets x times |
| (…) | total number of stitches in the round |
Pattern Notes
- The doll is crocheted mostly in continuous rounds.
- Use a stitch marker to mark the first stitch of each round.
- The original doll was made with X-shaped single crochet stitches.
- The head, ears, and arms are crocheted separately; the legs are crocheted separately first, then joined and continued into the body.
- The socks and simple underwear are created with color changes while crocheting the legs and body.
- The arms are lightly stuffed only to the middle so they do not stick out too much.
- Safety eyes are inserted between Rounds 19 and 20 of the head, and the eyelashes are embroidered separately next to the eyes.
- Optional mouth shaping can be made between Rounds 7 and 8, counting from the bottom of the head.
- The nose is embroidered between Rounds 12 and 13 and is approximately 3 stitches wide.
- Hair is added after the doll is assembled.
Want a more detailed crochet doll body pattern?
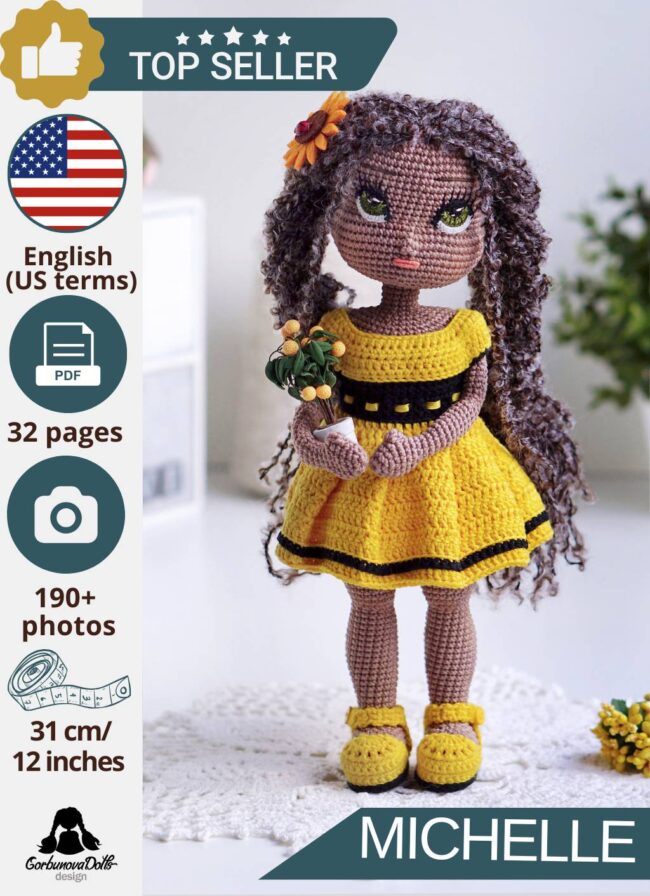
If you enjoy learning doll body construction, you may also like my detailed premium crochet doll body patterns. These PDF tutorials include step-by-step instructions, many helpful photos, and carefully designed proportions for making polished amigurumi dolls.


Pattern Instructions
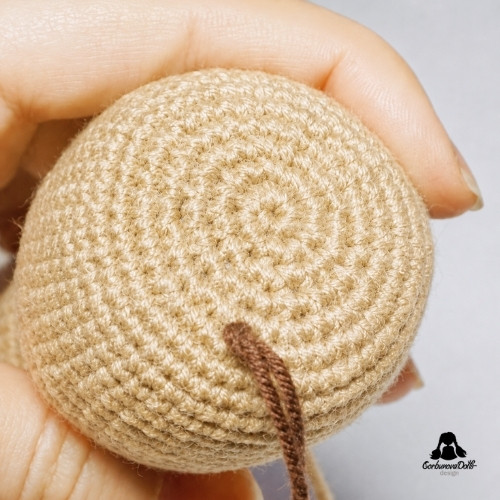
Head
Use the skin color yarn. Work in continuous rounds and place a stitch marker in the first stitch of each round. Stuff the head firmly as you work.
R1: 6 sc in magic ring (6)
R2: inc in each st around (12)
R3: [1 sc, inc] x 6 (18)
R4: 1 sc, inc, [2 sc, inc] x 5, 1 sc (24)
R5: [3 sc, inc] x 6 (30)
R6: 2 sc, inc, [4 sc, inc] x 5, 2 sc (36)
R7: [5 sc, inc] x 6 (42)
R8: 3 sc, inc, [6 sc, inc] x 5, 3 sc (48)
R9: [7 sc, inc] x 6 (54)
R10: 4 sc, inc, [8 sc, inc] x 5, 4 sc (60)
R11: [9 sc, inc] x 6 (66)
R12: 5 sc, inc, [10 sc, inc] x 5, 5 sc (72)
R13-26: sc in each st around (72, 14 rounds)
R27: 5 sc, dec, [10 sc, dec] x 5, 5 sc (66)
R28: [9 sc, dec] x 6 (60)
R29: 4 sc, dec, [8 sc, dec] x 5, 4 sc (54)
R30: [7 sc, dec] x 6 (48)
R31: 3 sc, dec, [6 sc, dec] x 5, 3 sc (42)
R32: [5 sc, dec] x 6 (36)
R33: 2 sc, dec, [4 sc, dec] x 5, 2 sc (30)
R34: [3 sc, dec] x 6 (24)
Fasten off, leaving a long tail for sewing if needed.
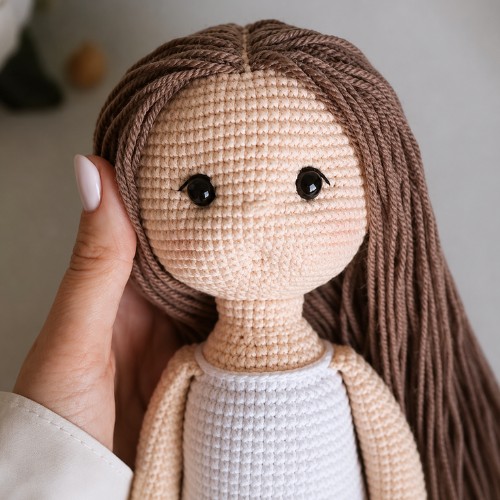
Face Details
- Insert the safety eyes between Rounds 19 and 20.
- Leave 10 stitches between the eyes.
- Embroider the eyelashes next to the safety eyes using black yarn or embroidery thread.
- Embroider the nose between Rounds 12 and 13. The nose is approximately 3 stitches wide.
- Add blush to the cheeks if desired, or add it later after the doll is assembled.
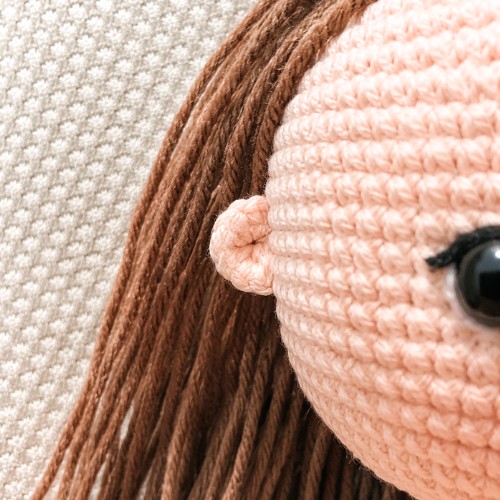
Ears
Make two ears using the skin color yarn.
R1: 7 sc in magic ring
Do not join the round. Fasten off, leaving a tail for sewing. Sew the ears to the sides of the head.
Legs
Start with white yarn. Work in continuous rounds and place a stitch marker in the first stitch of each round. Stuff firmly as you work.
R1: ch 11. Starting from the 2nd ch from the hook: 9 sc, inc, then work along the other side of the foundation chain: 9 sc (20)
R2-11: sc in each st around (20, 10 rounds)
R12: 1 sc, 11 hdc, 1 sc, 7 sl st (20)
R13: 12 sc, 8 sc in flo (20)
R14: 1 sc in flo, 19 sc (20)
R15: sc in each st around (20)
R16: 2 sc, change to skin color yarn: 18 sc in blo (20)
R17: 2 sc in blo, 18 sc (20)
R18-20: sc in each st around (20, 3 rounds)
R21: 2 sc, inc, 10 sc, inc, 6 sc (22)
R22-25: sc in each st around (22, 4 rounds)
R26: [3 sc, dec] x 3, 7 sc (19)
R27: sc in each st around (19)
R28: [3 sc, inc] x 3, 7 sc (22)
R29-30: sc in each st around (22, 2 rounds)
R31: 3 sc, inc, 5 sc, inc, 5 sc, inc, 6 sc (25)
R32-40: sc in each st around (25, 9 rounds)
R41: 5 sc; change to white yarn: 20 sc (25)
R42: 5 sc, 20 sc in blo (25)
R43: 5 sc in blo, 20 sc (25)
R44: sc in each st around (25)
Work 8 sc more if needed to move the working yarn to the side. Fold the leg in half and crochet 12 sc through both layers to close the top of the leg. Fasten off.
Make the second leg the same way.
Body
The body starts by joining the legs. Use white yarn first. Stuff the body firmly as you work.
R1: Join the legs by working into the front loops: 12 sc along one side of the first leg, turn and work 12 sc along the other side of the same leg through the front loops. Then work 12 sc along one side of the second leg, turn and work 12 sc along the other side of the second leg (48)
R2-11: sc in each st around (48, 10 rounds)
Change to skin color yarn.
R12: blo 11 sc, dec, 22 sc, dec, 11 sc (46)
R13-14: sc in each st around (46, 2 rounds)
R15: 11 sc, inc, 22 sc, inc, 11 sc (48)
Change to white yarn.
R16: sc in each st around (48)
R17: sc in each st around in blo (48)
R18-26: sc in each st around (48, 9 rounds)
R27: [6 sc, dec] x 6 (42)
Change to skin color yarn.
R28: blo [5 sc, dec] x 6 (36)
R29: sc in each st around (36)
R30: [4 sc, dec] x 6 (30)
R31: [3 sc, dec] x 6 (24)
R32: sc in each st around in blo (24)
R33-35: sc in each st around (24, 3 rounds)
Fasten off, leaving a long tail for sewing the body to the head if needed.
Arms
Make two arms using the skin color yarn. Stuff the arms only to the middle and not too firmly so they do not stick out from the body.
R1: 8 sc in magic ring (8)
R2: inc in each st around (16)
R3-34: sc in each st around (16, 32 rounds)
R35: 8 sl st, 8 sc (16)
Fold the arm in half and crochet 8 sc through both layers to close the top of the arm. Work through the front loops when closing, if needed for the correct finish.
Sew the arms to the body at Round 27.
Finishing
- Single crochet around the socks, shorts, and top for a neater edge. Use the remaining front loops from the rounds where you previously worked in back loops only.
- Sew the head securely to the body.
- Optional: make the mouth shaping between Rounds 7 and 8, counting from the bottom of the head. You can skip this step if you prefer a simpler face or are not comfortable with face shaping.
- Weave in any remaining yarn ends.
- Add blush to the cheeks, if you have not added it earlier.
Hair
Use a smaller crochet hook for convenience and yarn suitable for the doll hair.
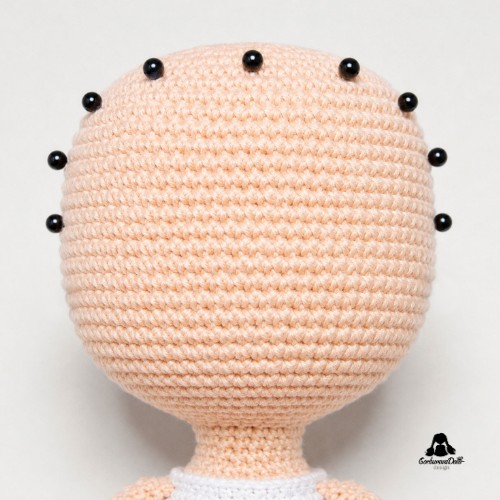
First, mark the hairline with pins. Place the pins around the front, sides, and back of the head to outline where the hair will be attached. This will help you keep the hairline even and symmetrical.
Cut several strands of yarn for the hair. Each strand will be folded in half when attached to the head, so the finished hair length will be approximately half the length of the cut yarn strand.
To make many even strands at once, wrap the yarn around a book, preferably an A4-size book or notebook. After wrapping the yarn, cut it along one side of the book. This will give you several hair strands of approximately the same length.

Start attaching the strands along the pinned hairline first.
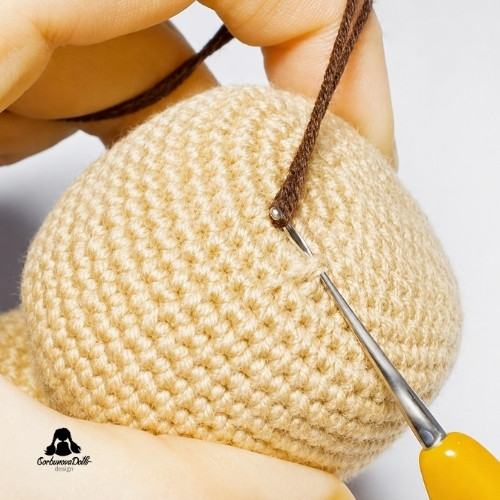
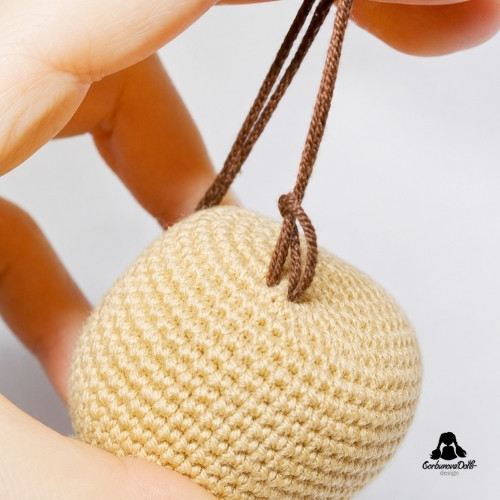
Attach each strand to the head as follows:
- Insert the hook into a stitch along the marked hairline where you want to attach the first hair strand.
- Fold one yarn strand in half and catch the middle of the strand with your hook.
- Pull the folded loop through the stitch slightly.
- Catch both yarn ends with the hook and pull them through the loop.
- Tighten gently to secure the strand.
Continue attaching yarn strands along the marked hairline until the hairline is filled.
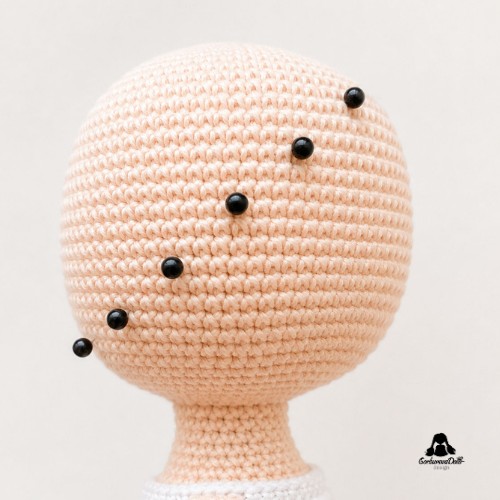
Next, divide the top of the head by marking the hair parting with two close parallel lines of pins. Attach yarn strands along both parting lines in the same way.
After the hairline and parting are filled, add extra strands randomly inside the remaining hair area to make the hair look fuller. When all strands are attached, trim and style the hair as desired.
Your Crochet Base Doll Is Finished!
Congratulations – your crochet base doll is ready! This handmade doll body can be used as a base for custom outfits, hairstyles, accessories, and your own crochet doll styling ideas.
If you have any questions while following this tutorial, feel free to contact me and I’ll do my best to help.
I hope you enjoyed this free crochet base doll pattern. If you make your own doll, I’d love to see it! Tag me on Instagram @gorbunova.dolls or share your photo in my Facebook group, Ami & Hook Society.
Want to crochet more detailed dolls?
Explore my premium amigurumi doll patterns – beautifully structured PDF patterns with clear instructions, helpful step-by-step photos, and charming finished dolls you’ll be proud to make.


Pattern Credit & Permissions
This pattern was originally designed by @natali_lit_toys and is shared here as an English translation with credit to the original designer. Please do not sell, copy, repost, translate, or redistribute this pattern without permission from the original designer.
If you share finished items made from this pattern on social media, please credit the original designer by linking to @natali_lit_toys.
Comments (0)